6 Easy Methods to Fix SIM Failure iPhone Issue [Updated]
If you are having a SIM failure issue on your iPhone and don’t know how to fix it, we’ve got you covered. Check out these 6 foolproof methods to fix the SIM failure iPhone issues.
Although the SIM card may be small in size, if you remove it from an iPhone, then the device becomes just like a fabulous wall clock that has stopped working. You can still use the high-tech processor with a web browser, calendar, alarm clock, and super cool camera. But what you miss is the “Phone” part.
So whenever iPhone users encounter the situation of SIM failure, they always look for ways to fix it. And if you are also one of those unlucky people, then be glad because your search ends here. In this brief guide, we are going to show you 6 easy, tried, and tested methods to fix SIM failure issues within minutes. But before we dive into those methods, let’s see what might be causing this SIM failure issue.
And here are some other tips about SIM problems. Check them out if you like:
Why Does My iPhone Say SIM Failure?
Various reasons may cause SIM failure issues in iPhones. Here are some that are the culprit in most cases.
- Any problem with the SIM tray can prevent the iPhone from recognizing your SIM.
- If you are using an outdated version of iOS on your device, then it may also cause the SIM failure issue.
- If your SIM card is damaged, scratched, or locked, then you might encounter a SIM failure issue.
- A system error in the device due to hardware damage, software glitches, or altered carrier settings can also be responsible for the SIM failure issue.
Now considering these causes of the iPhone SIM failure issues, let’s move forward and see 6 easy ways to fix the issue.
6 Ways to Fix SIM Failure iPhone Issue
Below are 6 easy methods to fix SIM failure problem on your iPhone. Let’s check them one by one.
Method 1. Restart Your iPhone
The first and the most convenient method that can fix your SIM failure issue is to restart your device. It is the simplest method that refreshes the system and removes most of the system glitches.
To restart your iPhone, here’s what you need to do.
Step 1. Press and hold the power button with either of the Volume buttons in iPhone X, 11, 12, 13, or later versions. If you have any other model, then just press the power button. A turn-off slider will appear.
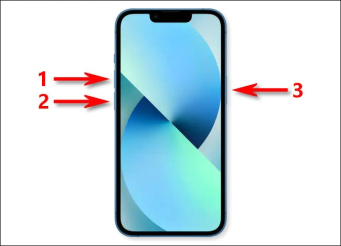
Restart iPhone
Step 2. Now what you have to do is to drag the power off slider to the right and wait until the device shuts down.
Step 3. Once the device has turned off, press and hold the power button again until you see an Apple logo.
If your device becomes unresponsive or frozen at any point, then try Force Restarting the device. The process of force restarting an iPhone differs with different versions. So here we have explained them separately for your ease.
iPhone 8 or SE (2nd generation or later):
- Press and quickly release the Volume Up button and then the Volume Down button once each.
- Now long press the Power button until you see the Apple logo on screen.
- Release the Power button when the Apple logo appears.
iPhone 7 or 7 Plus:
- Press and hold the Sleep/Wake button with the Volume Down button.
- Release both buttons when the apple logo appears.
iPhone 6 or older:
- Press and hold both the Home button and the Sleep/Wake button simultaneously.
- Wait until the Apple logo appears, and then release them.
If even restarting your phone doesn’t solve your issue, then move on to our second method and see if there’s any problem with your SIM tray.
Method 2. Check the SIM Tray
You can encounter the SIM failure issue if there’s any dust in the SIM tray or if the SIM is not properly inserted.
So just take a SIM ejector and remove the SIM tray of your device. Clean it with a clean cloth and insert it again. Make sure that you place your SIM correctly in the tray and that it is properly closed.
If you are still facing the issue, then there’s a chance that your SIM card is locked. Let’s see how we can unlock it with a trustworthy tool, AnyUnlock.

Check the SIM Tray
Method 3. Unlock SIM Card with iOS Unlocker
SIM lock is offered to protect your SIM from unauthorized use. But the opposite can occur in some cases. If you forget your SIM lock pin, then even you won’t the ability to use it once you restart your device or insert the SIM on another device. In this case, you’ll see a “SIM not Valid” prompt on your device. This is the time when you have to unlock your SIM before you can use it. But how to do it? With AnyUnlock – iPhone Password Unlocker, of course. It is an all-in-one passcode remover for various iOS devices and its advanced technology provides one of the highest success rates on top of a user-friendly interface. Let’s have a look at what AnyUnlock is, and then we’ll see how we can unlock our SIM using it.
Free Download * 100% Clean & Safe
- Unlock all iOS locks – Any lock on your device, like screen lock, SIM lock, MDM lock, iCloud activation lock, etc. can all be unlocked by it with ease.
- Supports any network carrier – Whether your SIM card is locked by AT&T, Verizon, or any other network carrier, AnyUnlock can unlock it for you.
- Only in simple clicks – No techniques requirement. No skills difficulties. Anyone can easily operate this tool to unlock in clicks.
- Compatible with all iOS systems – All iOS systems and iPhone models are supported, including the latest iOS 16 and iPhone 14 series.
Now download AnyUnlock and let’s see how we can unlock our SIM with AnyUnlock in a stepwise manner.
Step 1. Launch AnyUnlock on your computer and connect your device to the computer using a connection cable. Select “Remove SIM Lock” from the opening interface and hit “Start Now” once the software detects your device.
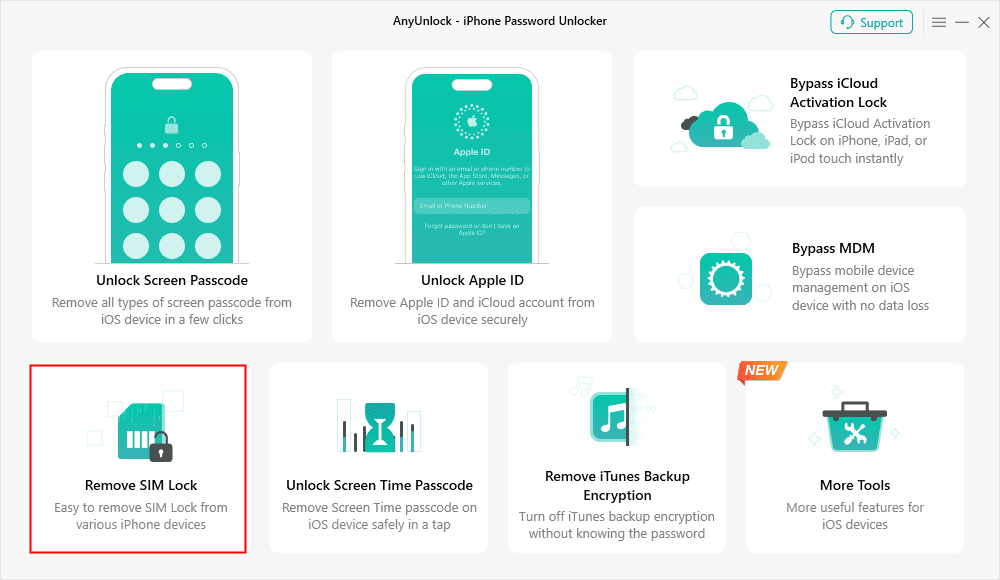
Choose Remove SIM Lock
Step 2. Now to remove the SIM lock, you need your device to be jailbroken. Click on the “Jailbreak Now” option and follow the instructions provided by the tool to jailbreak your device.
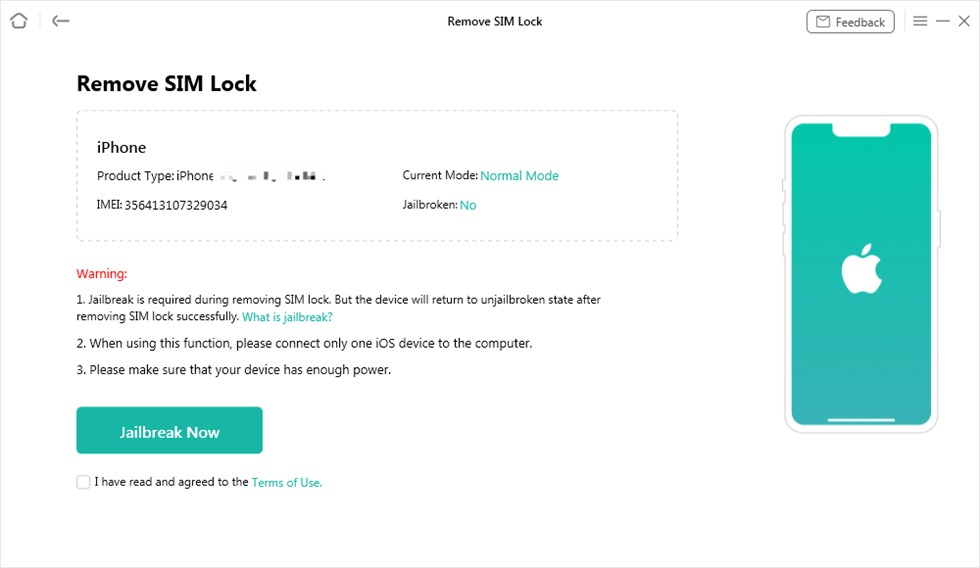
Click Jailbreak Now Button
Step 3. Once you have successfully jailbroken your device, click on the “Remove Now” option.
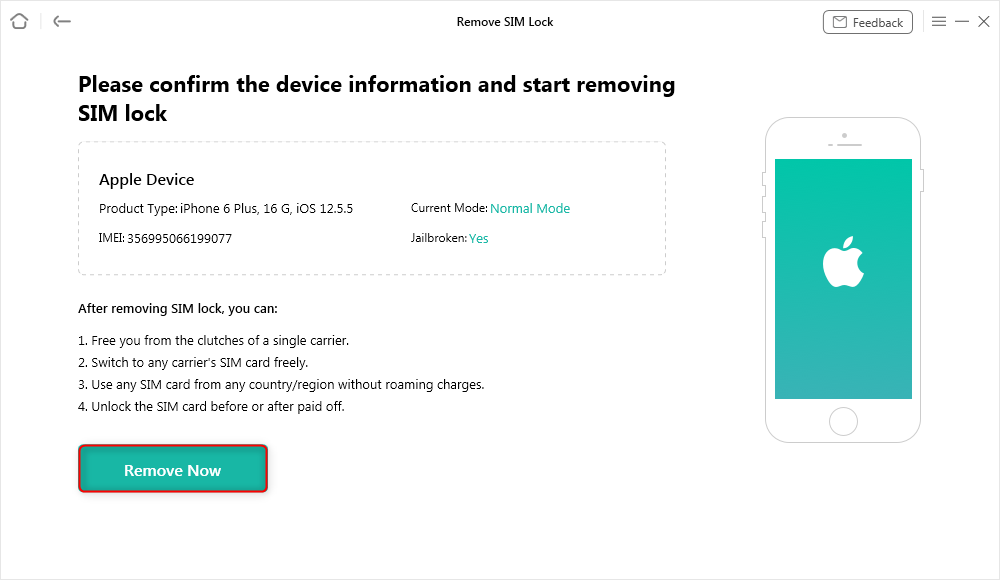
Click Remove Now
Step 4. Follow the on-screen instructions to set your device, and then hit “OK.” AnyUnlock will start removing your SIM lock. Pait patiently until it’s done.
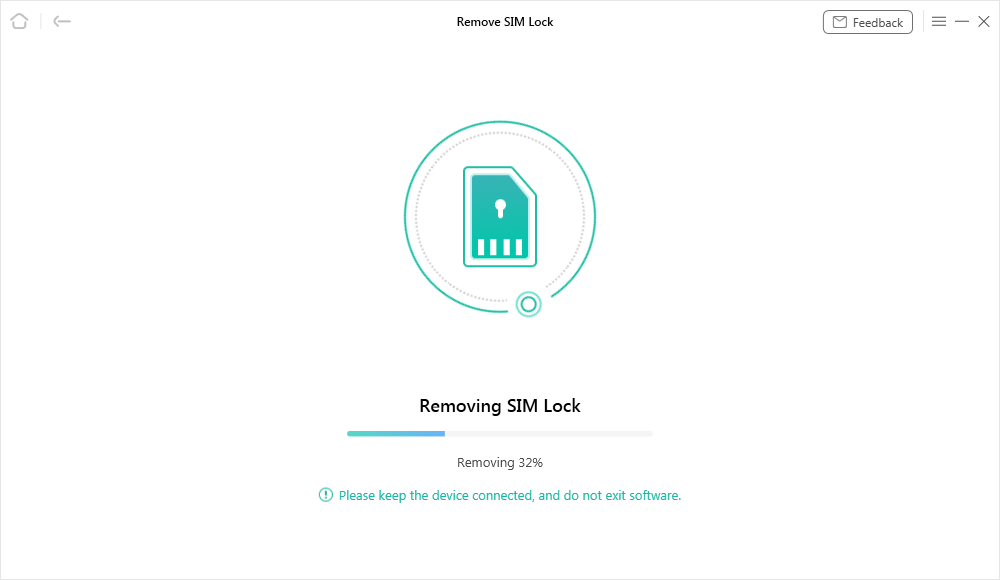
Start Removing
Step 5. Finally, you have successfully removed your SIM lock. Click on the “Done” button, remove your device and make calls all around the globe.
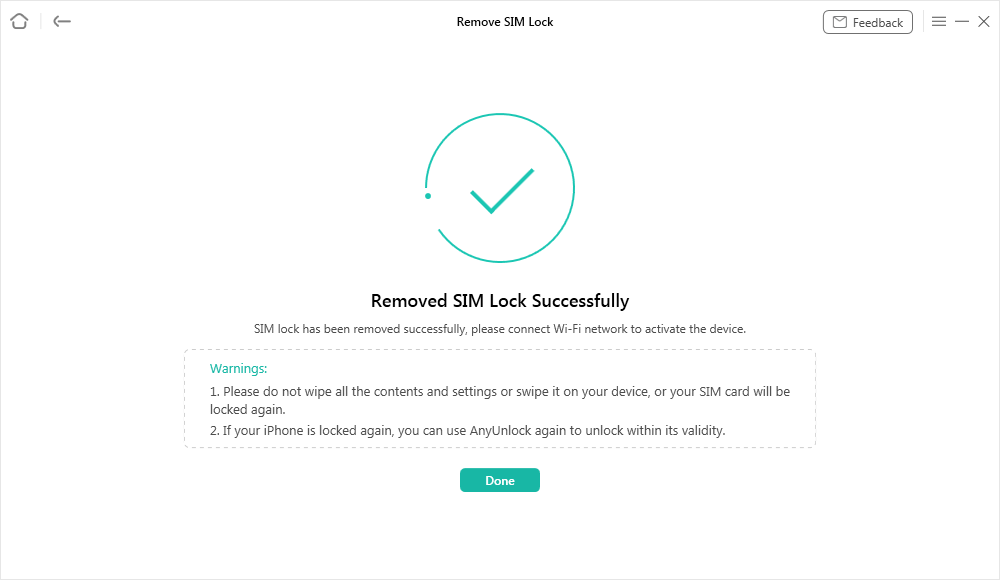
SIM Lock Removed Successfully
Method 4. Update Carrier Settings
If a new update is available from the service provider, then your device may not support the old version. But if you update your carrier settings, then the SIM failure issue is immediately resolved in this case.
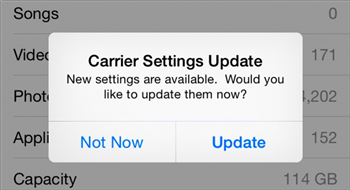
Update Carrier Settings on iPhone
For updating your carrier settings, here are the steps you need to follow.
- Open the Settings of your device and go to General > About.
- You will see an update option here if there is any.
- Click on the “Update” button.
This resolves most of the cases, but if you are still having the issue, then upgrading your iOS system might do the trick.
Method 5. Upgrade iOS System
An outdated operating system of your iPhone device sometimes causes the SIM failure issue. So you have to update the iOS system to get rid of this annoying issue.
Here is a step-by-step guide on how to update your iOS system.
- Find and launch the Settings app on your device.
- Now go to General > Software Update.
- Here you’ll see the available update of your iOS system. Click on “Download and Install” to install that update on your device. And if you cannot see the update, you can check the guide: How to Fix iOS 16 Update Not Showing Up >
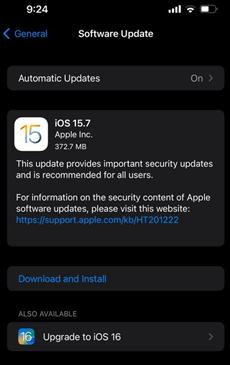
Upgrade to iOS 16
If even upgrading your iOS system doesn’t resolve the SIM failure issue, then try contacting the Apple Support team.
Method 6. Contact Apple Support
After trying the above 5 methods, you can get rid of your SIM failure issue in most cases. But if you are unlucky enough to still experience the same issue, then it’s better not to interfere anymore. Try contacting the Apple support team and explaining your problem to them. They’ll find the best solution possible and guide you to it.
The Bottom Line
So that’s it, guys. Now you don’t need to worry about any SIM failure issues on your iPhone. Use these 6 easy methods, and you’ll get your device working in no time. And if the issue is due to the SIM lock, then nothing is more reliable and safe than the first-class iPhone password unlocker, AnyUnlock. If you found our article helpful, share it on social media, and don’t forget to leave your feedback in the comments section below.
Free Download * 100% Clean & Safe
Product-related questions? Contact Our Support Team to Get Quick Solution >

