< Back
-
How much iCloud storage i have?
Once you set up iCloud, you would get 5GB storage automatically. With that storage space, you can store your photos in iCloud Photo Library, and keep your documents up to date in iCloud Drive. Please notice that if you run out of iCloud storage, your device will not backup data to iCloud anymore. If you need more space, you can purchase storage from Apple.
How to switch language on icloud.com?
How to change the language on icloud.com? Please kindly refer to the following steps to learn more about that.
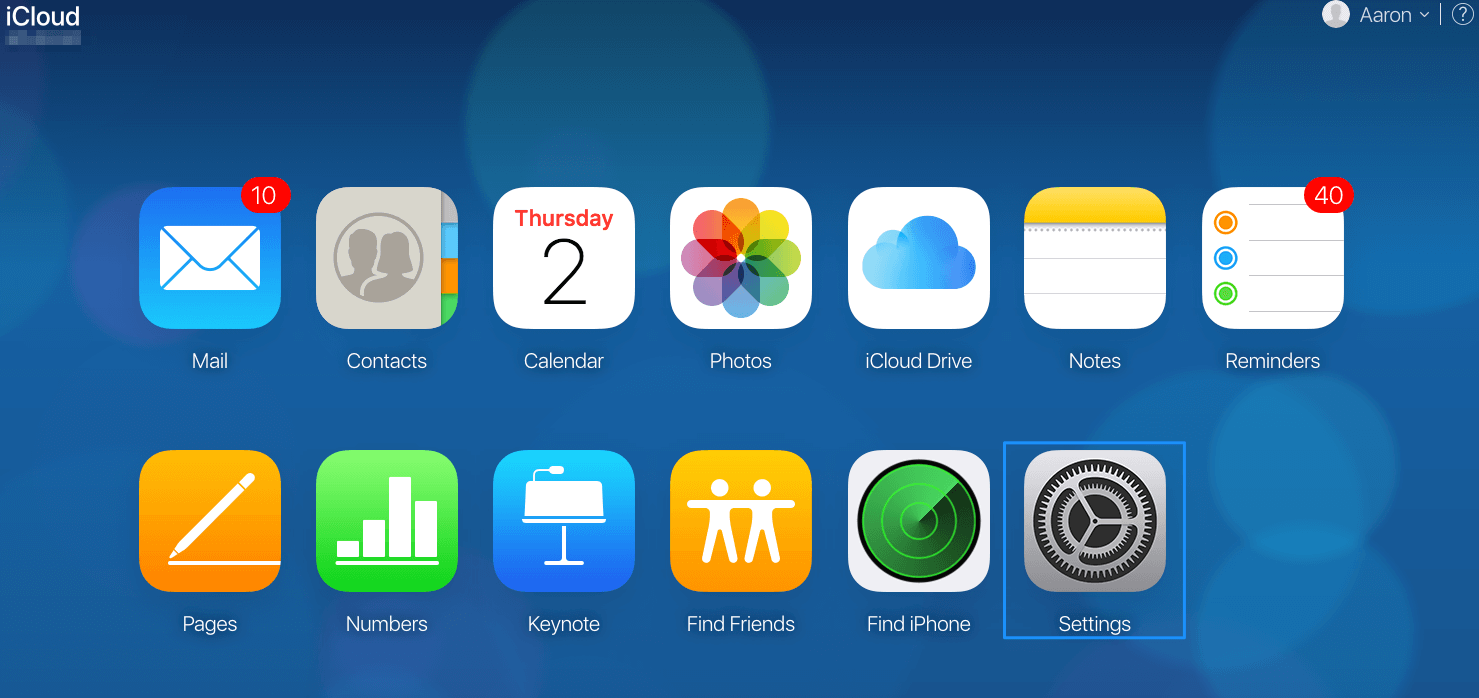
1. Go to iCloud official website (icloud.com) > Log in your iCloud account > Click Settings icon.
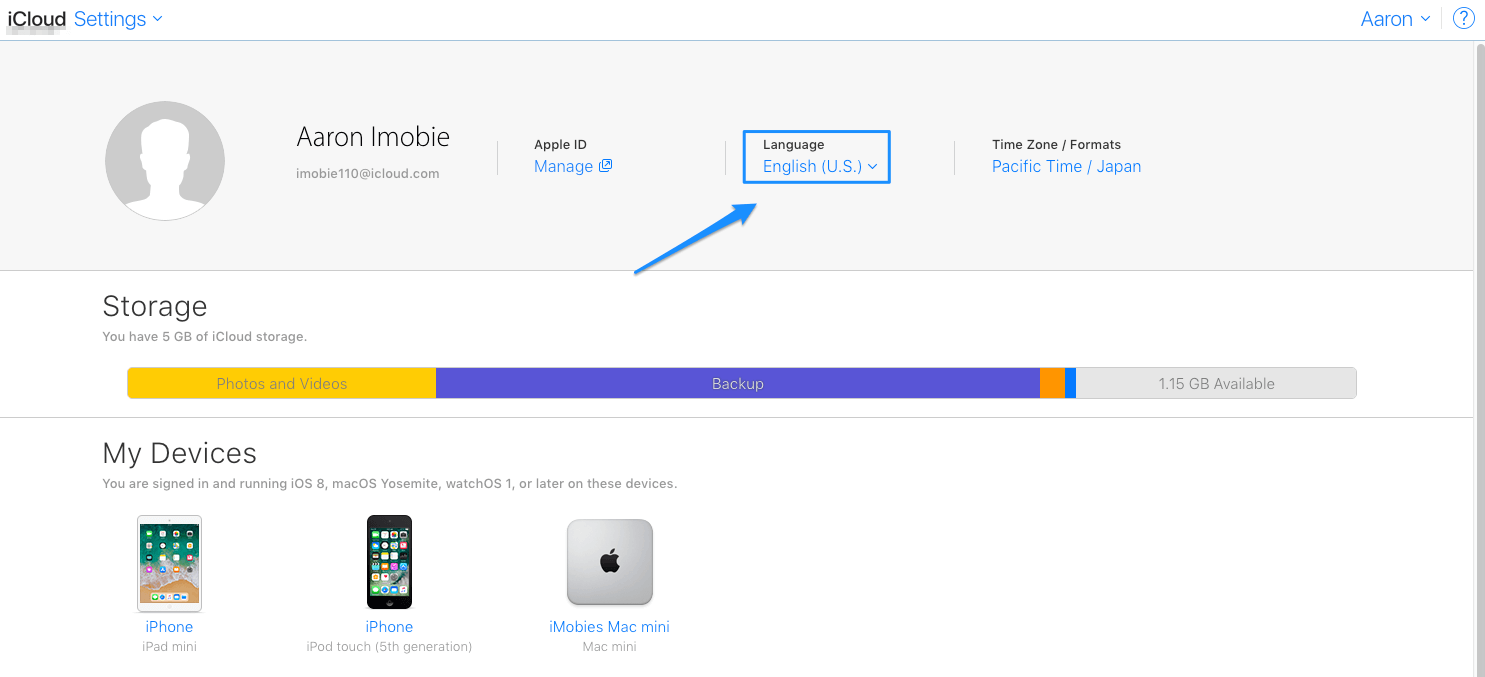
2. Then the interface below will display. After that, please click Language button to choose your preferred language.
How to change the time zone on icloud.com?
How to set the time zone on icloud.com? Please kindly follow the instructions below to learn more about that.
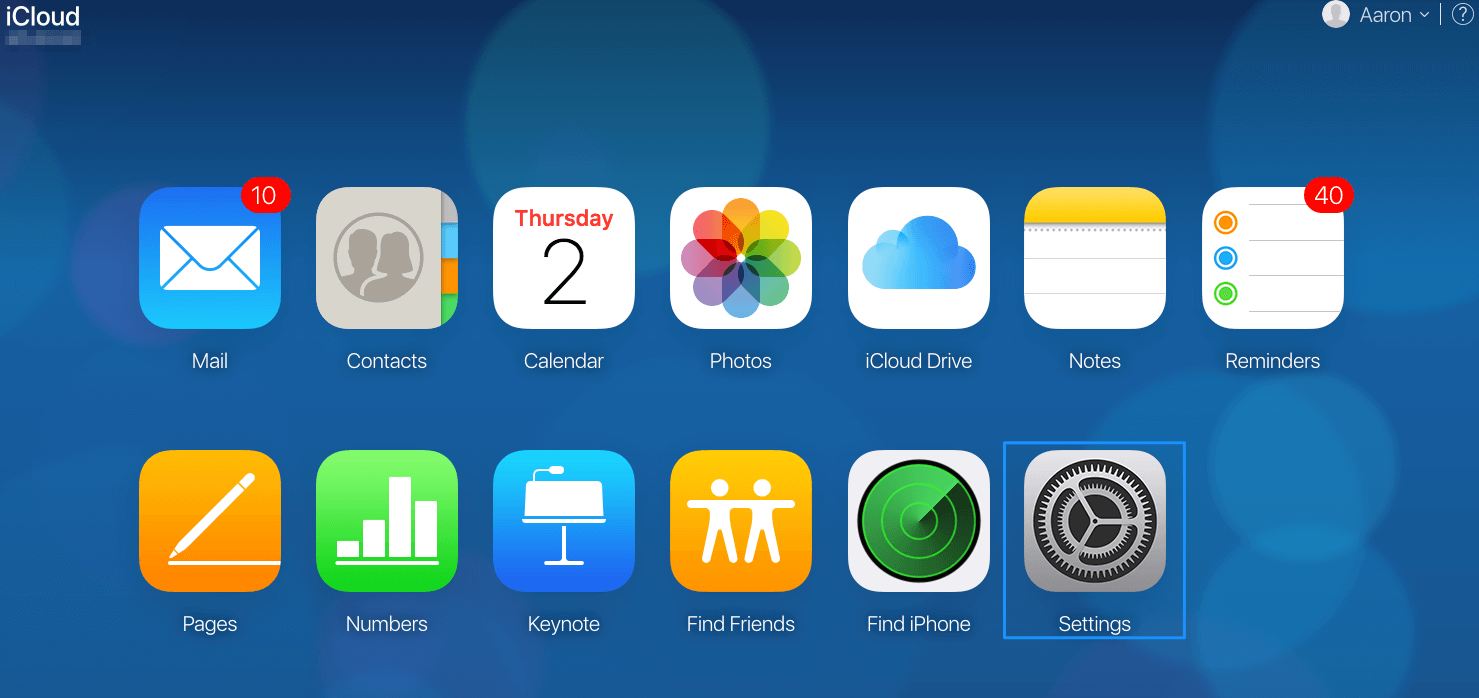
1. Go to iCloud official website (icloud.com) > Log in your iCloud account > Click the Settings icon.
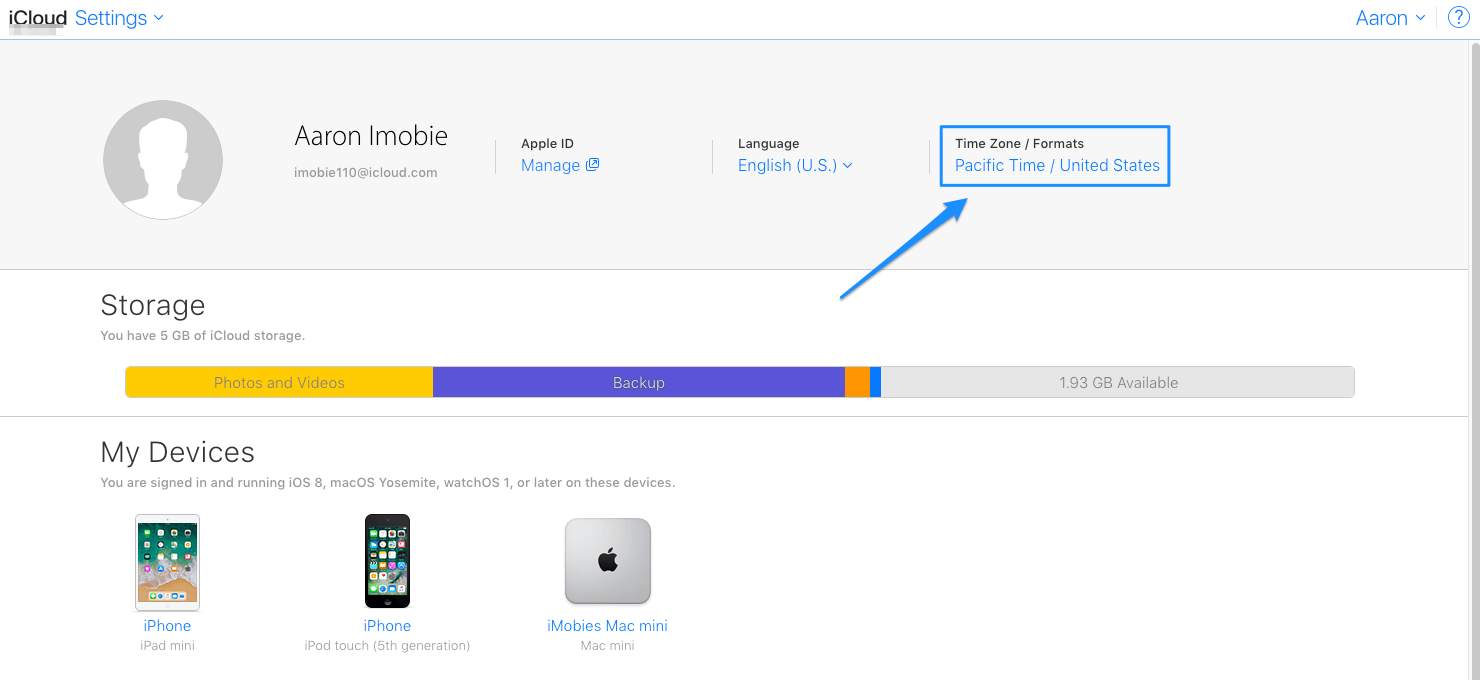
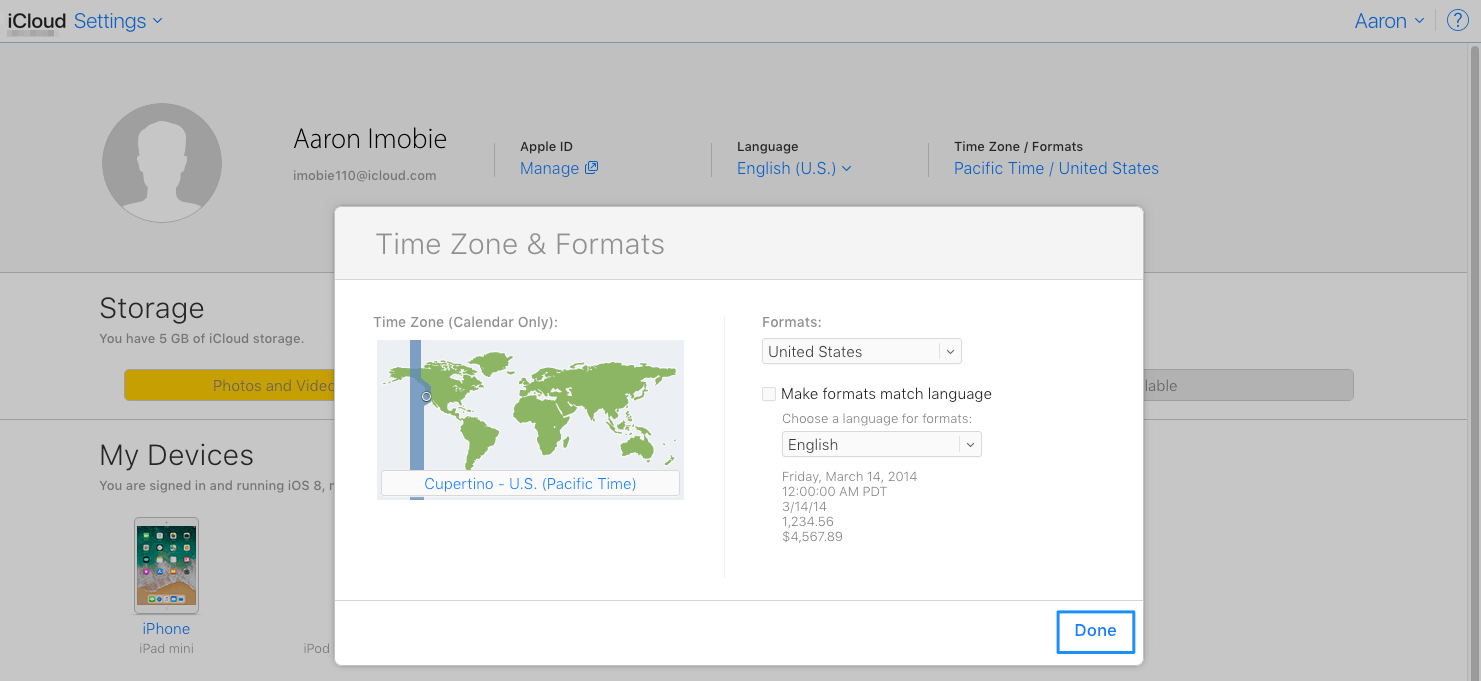
2. Then the interface below will display. Please click Time Zone / Formats to choose the current time zone.
3. Please kindly click the map near the place whose time zone you want to use on the interface below and then click Done to finish that.
-
How do I transfer photos between iOS devices via iCloud?
How to transfer photos between iOS devices with iCloud? Please follow the steps below to learn about that.
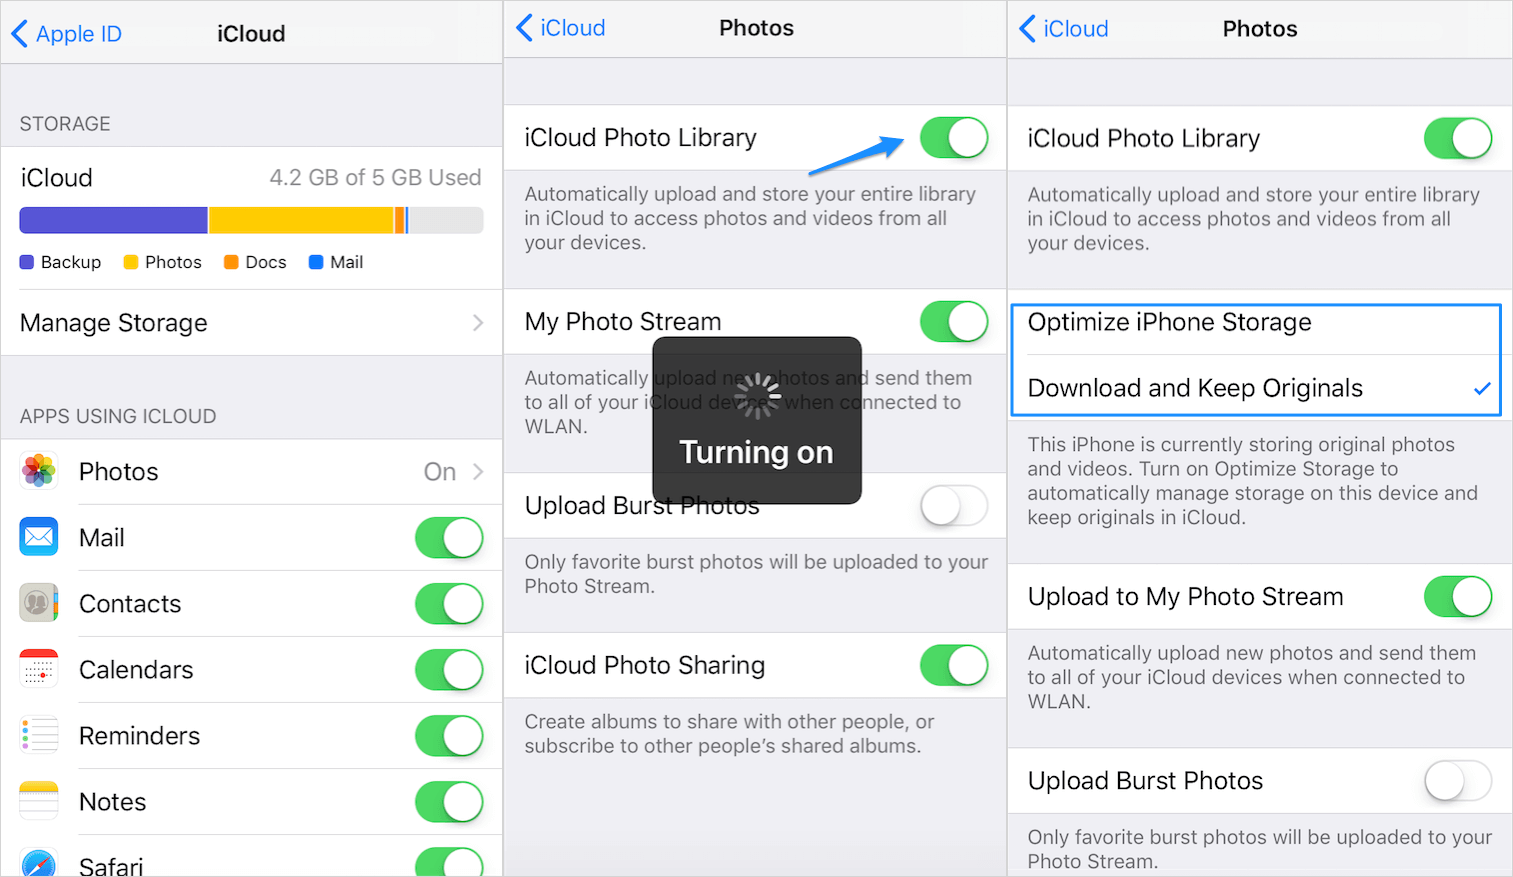
1. Please go to Settings > Tap on iCloud > Tap on Photos.
2. Please turn on iCloud Photo Library option.
3. Please Choose between “Optimize iPhone Storage” and “Download and Keep Originals”.
4. It takes a while to upload photos to the iCloud Photo Library. After it is done, you are able to access them from an All Photos album in the Photos app on iOS devices.
Meanwhile, please make sure the two devices are iOS 8.3 or higher and log into the same Apple ID. And you need to make your devices connect a wireless network to upload the photos. You also need to make sure there is enough iCloud storage space since iCloud Photo Library uses your iCloud storage allotment.
How do I export photos from iCloud to computer with iCloud?
How to transfer photos from iCloud to computer with iCloud? Please refer to the methods below to know more about that.
For Windows:
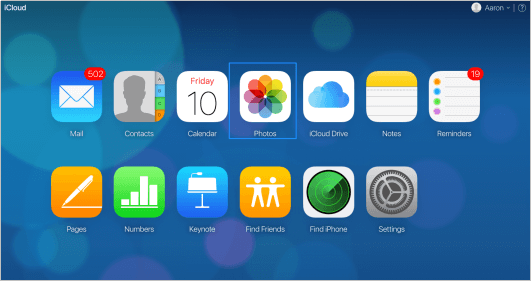
1. Go to iCloud official website (icloud.com) > Log in your iCloud account > Click the Photos icon.
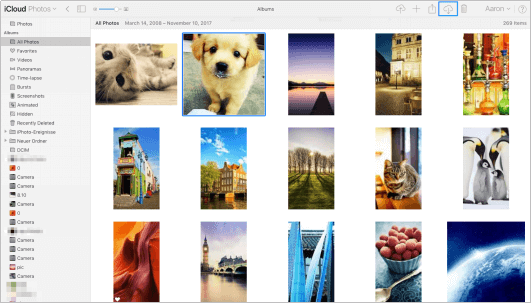
2. Select the photos that you want to download and then please click the Download tab on the upper right.
For Mac:
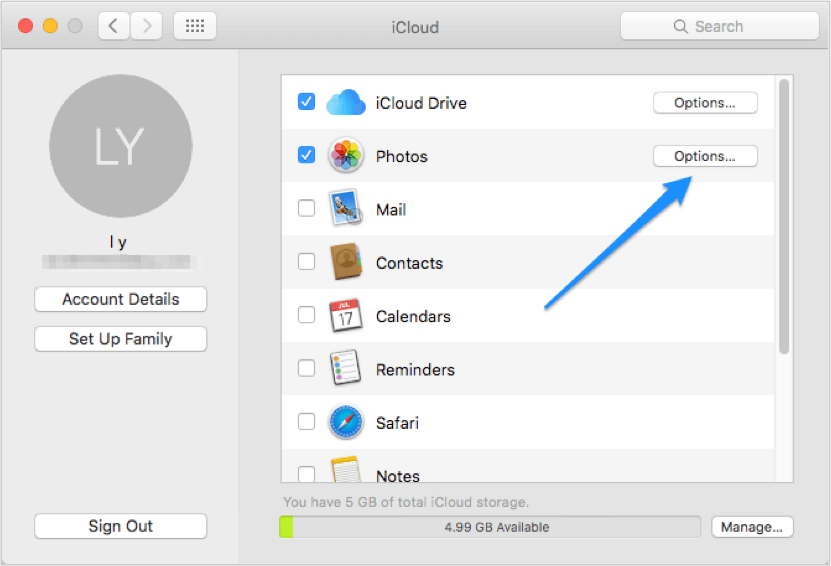
1. Go to iCloud Preference Panel > Click Options next to Photos.
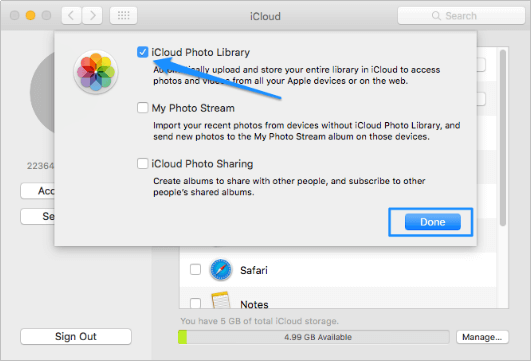
2. Choose iCloud Photo Library > Click Done.
How to recover deleted photos from iCloud Photo Library?
How to recover your deleted photos from iCloud Photo Library? Please refer to the following instructions to know more about that.
1. Please make sure that you’ve enabled iCloud Photo Library on your device. Here is the step:
Go to Settings > Your Account > iCloud > Photos > Turn on iCloud Photo Library.
2. Please go to iCloud.com on your computer and then log in with your iCloud account.
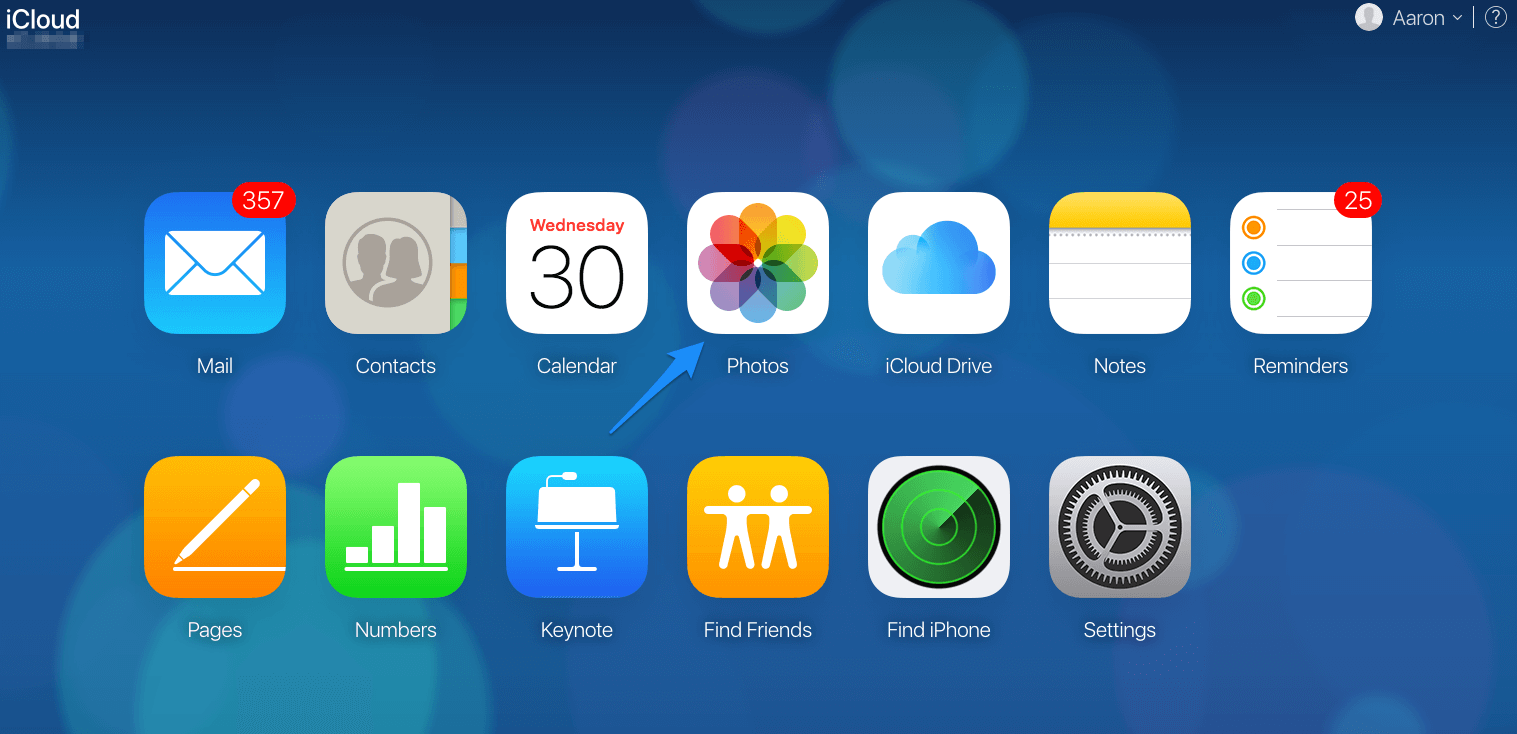
3. Click Photos icon and then you will see the pictures that have been uploaded to iCloud.
How to delete photos on icloud.com?
How to delete photos on icloud.com? Please kindly refer to the following instructions to know more about that.
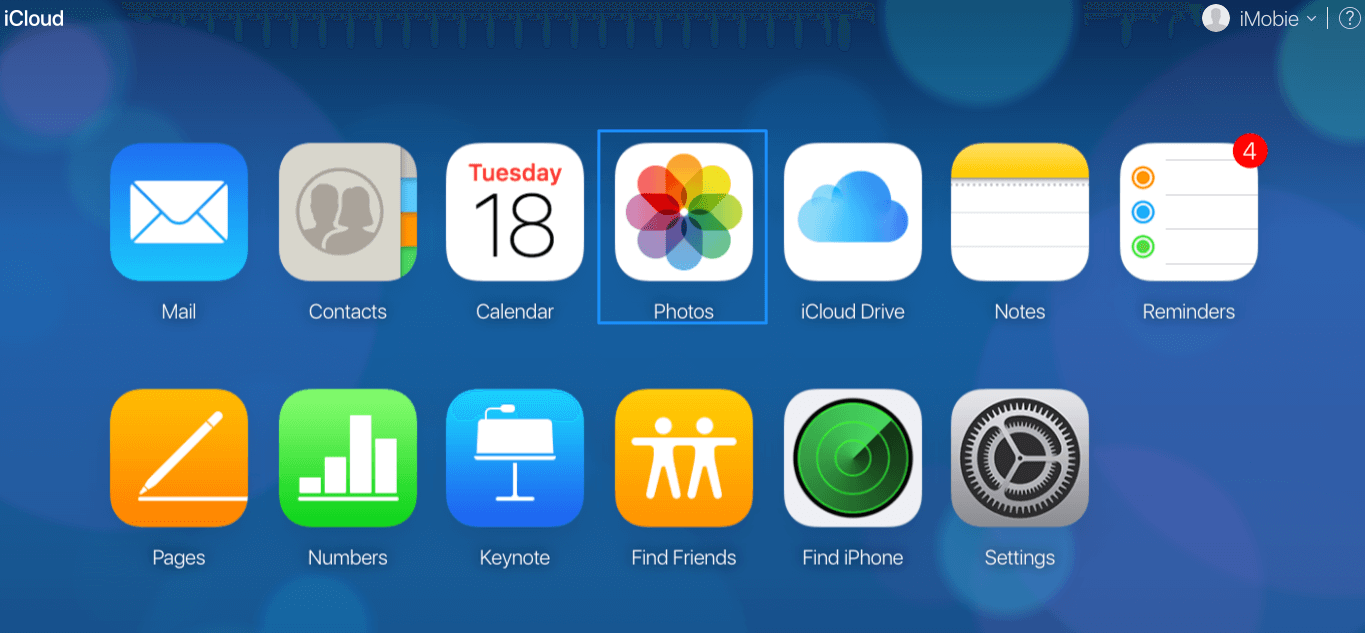
1. Go to iCloud official website (icloud.com) > Log in your iCloud account > Click Photos icon.
2. After that, please select the photos that you want to remove and click the Trash icon. Then please click Delete button to remove the chosen photos.
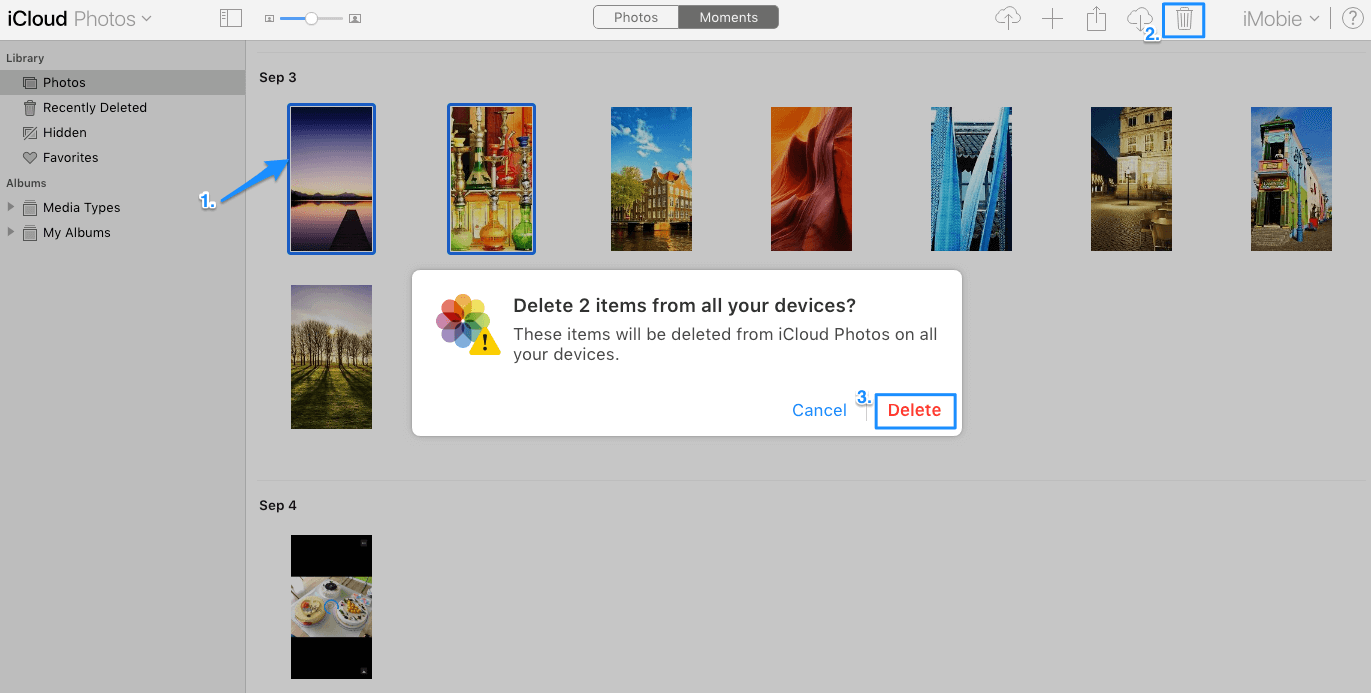
How to create a new photo album on icloud.com?
How to add a new photo album on icloud.com? Please kindly refer to the steps below to learn more about that.
1. Go to iCloud official website (icloud.com) > Log in your iCloud account > Click Photos icon.
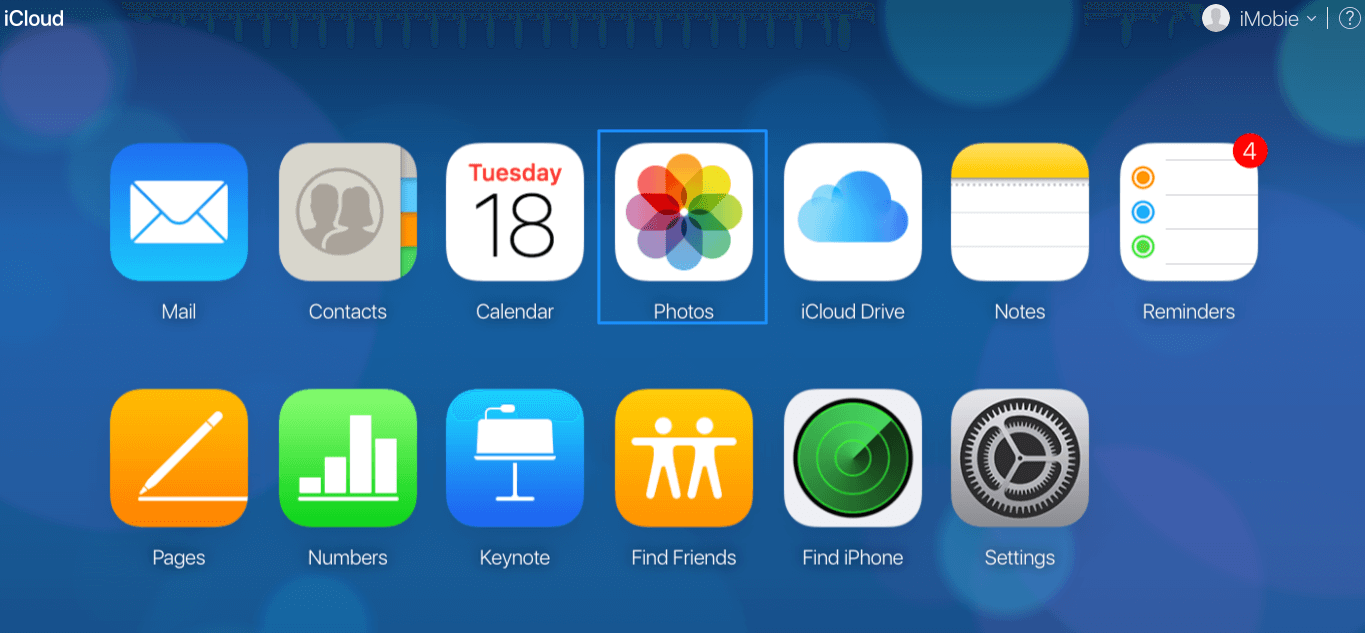
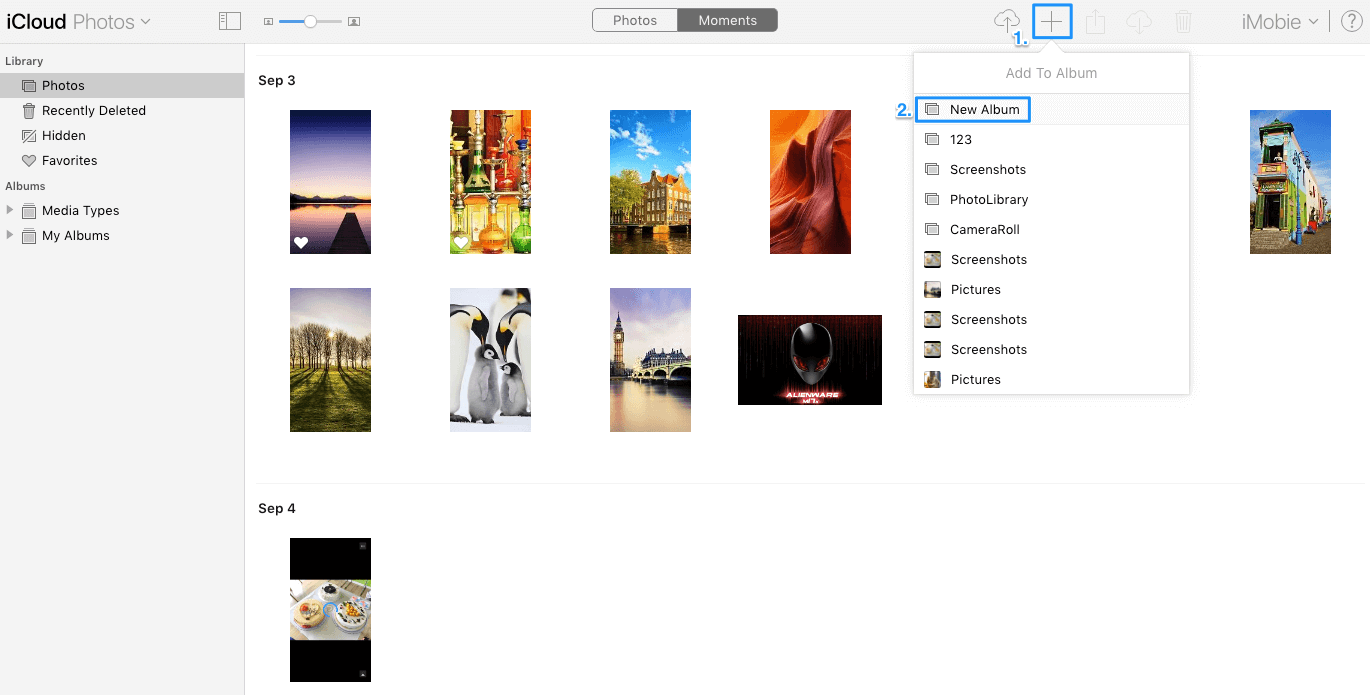
2. Please click Add icon on the upper right of the interface below. Then please click New Album.
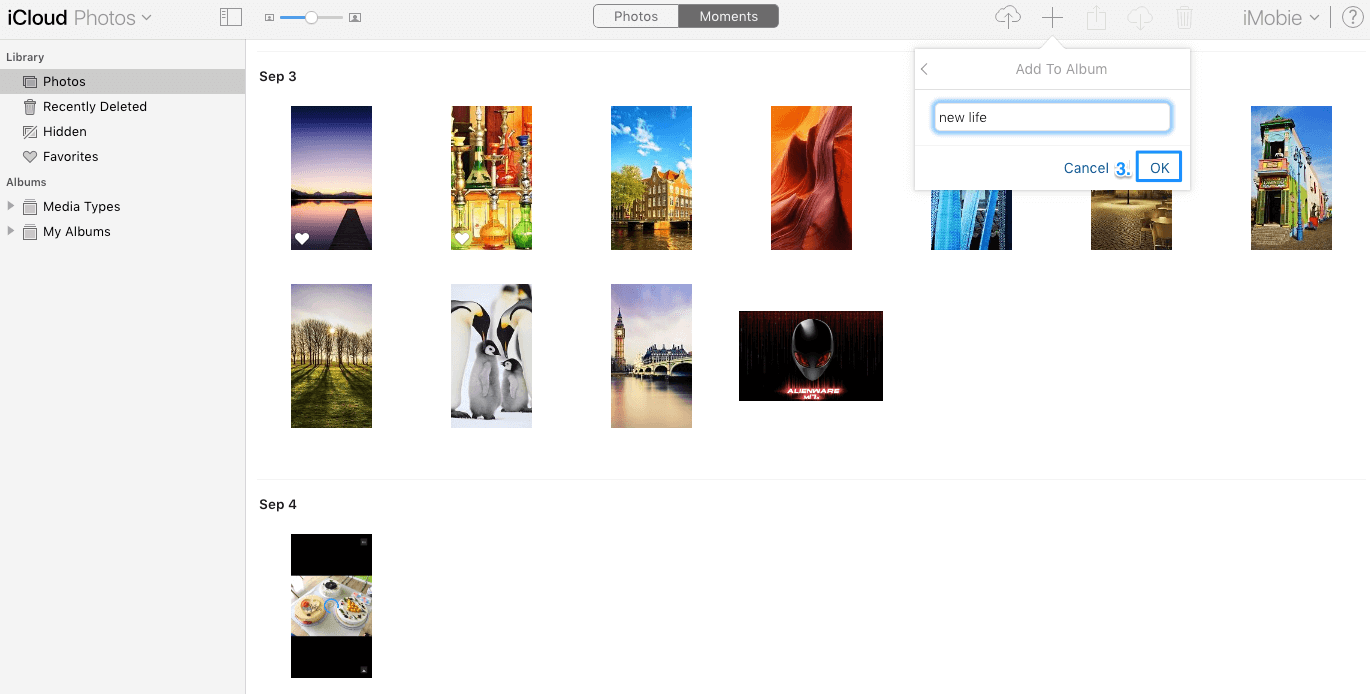
3. After that, the following interface will display. Please kindly enter the name of the album and click OK. Then the new photo album will be added successfully.
-
How to create a new folder of notes on icloud.com?
How to add a new folder of notes on icloud.com? Please follow the instructions below to know more about that.
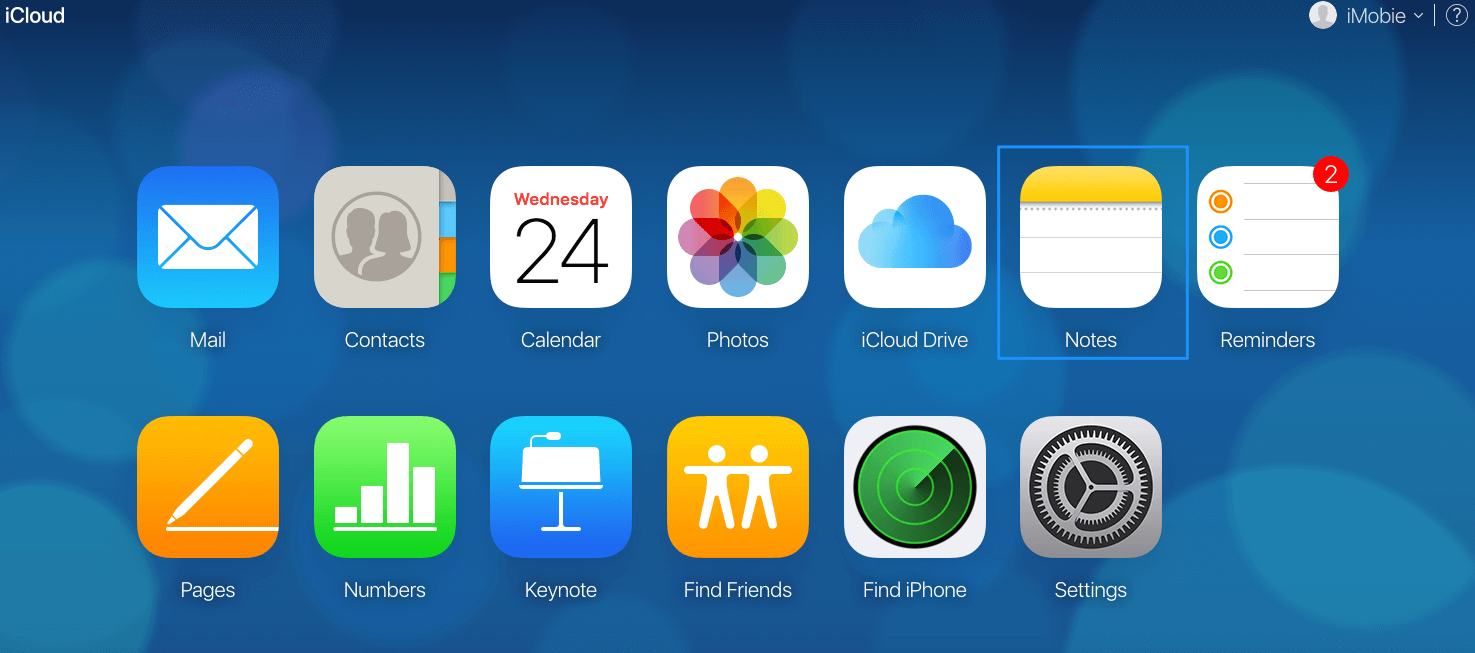
1. Go to iCloud official website (icloud.com) > Log in your iCloud account > Click Notes icon.
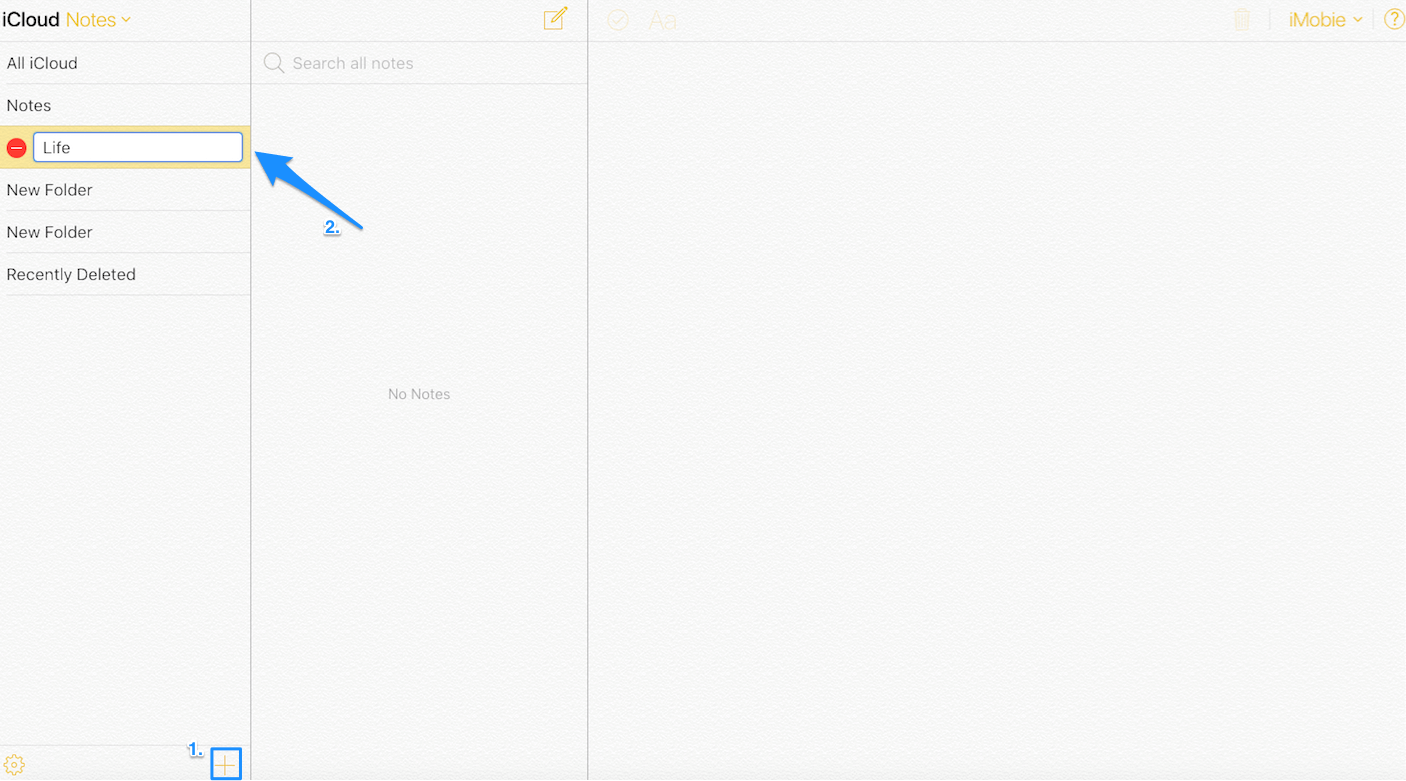
2. Please click Add icon at the bottom of the notes interface. After that, the following interface will pop up. Please kindly enter the name of folder that you want to add. Then the new folder will be added successfully.
How to delete the new created folder of notes on icloud.com?
How to remove the new created folder of notes on icloud.com? Please refer to following steps to learn more about that.
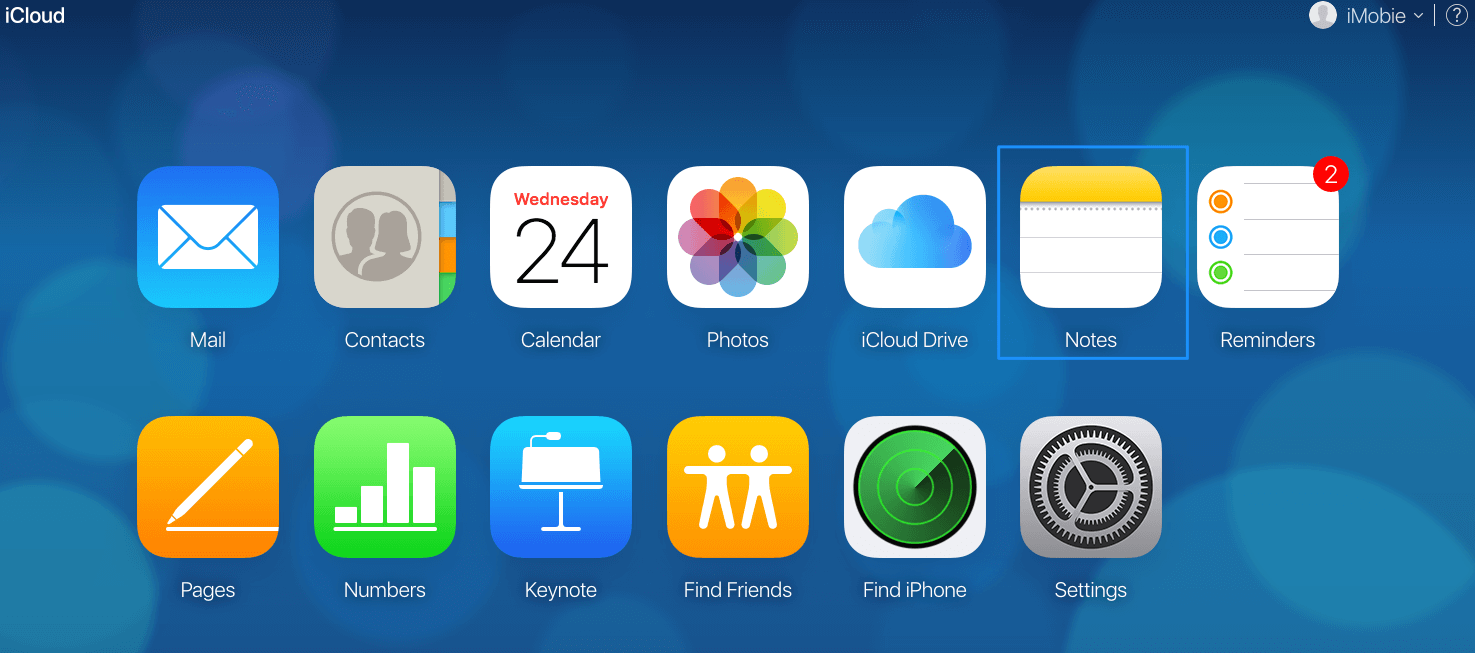
1. Go to iCloud official website (icloud.com) > Log in your iCloud account > Click Notes icon.
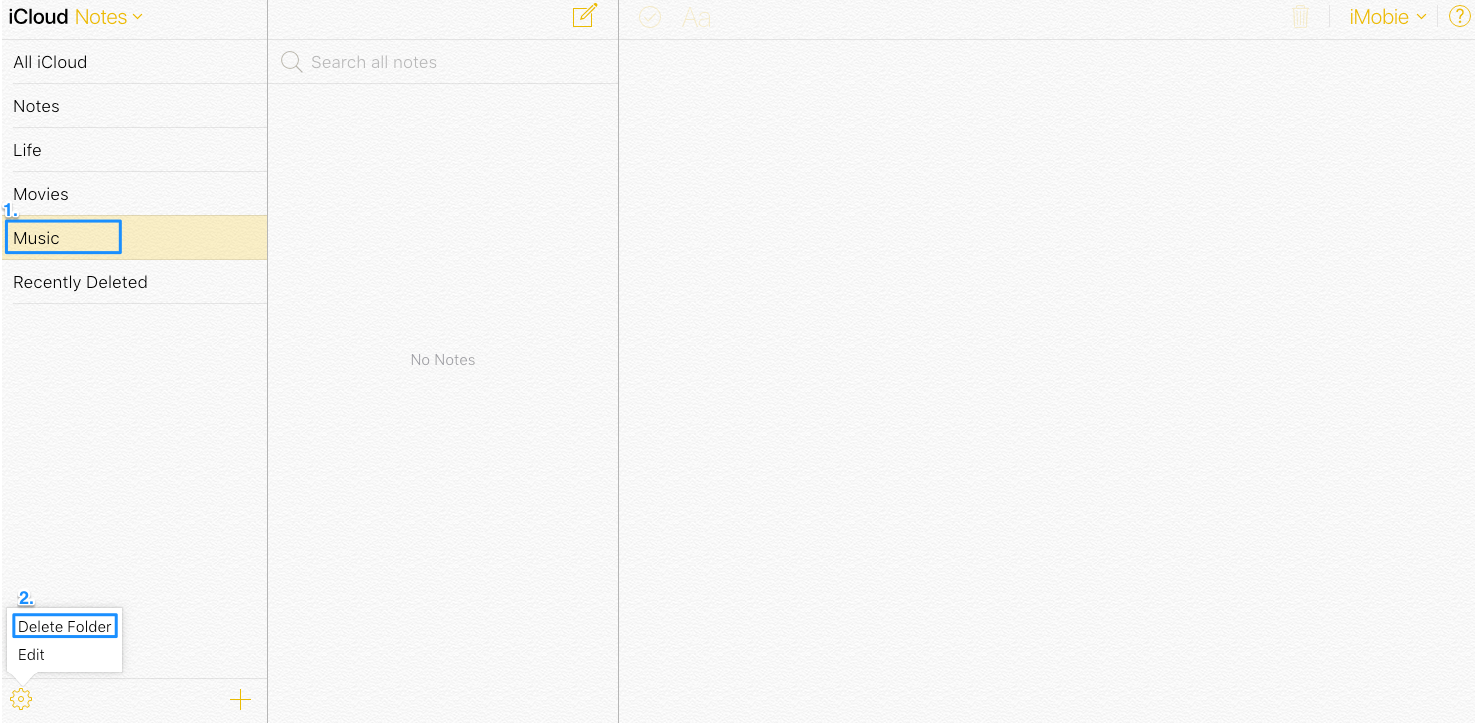
2. Please choose the folder that you want to remove and click the Settings button at the bottom-left of the notes interface. Then please kindly click “Delete Folder” button.
Or you can select the folder that you want to delete and click the folder. Then please click the Remove icon just like the picture below.
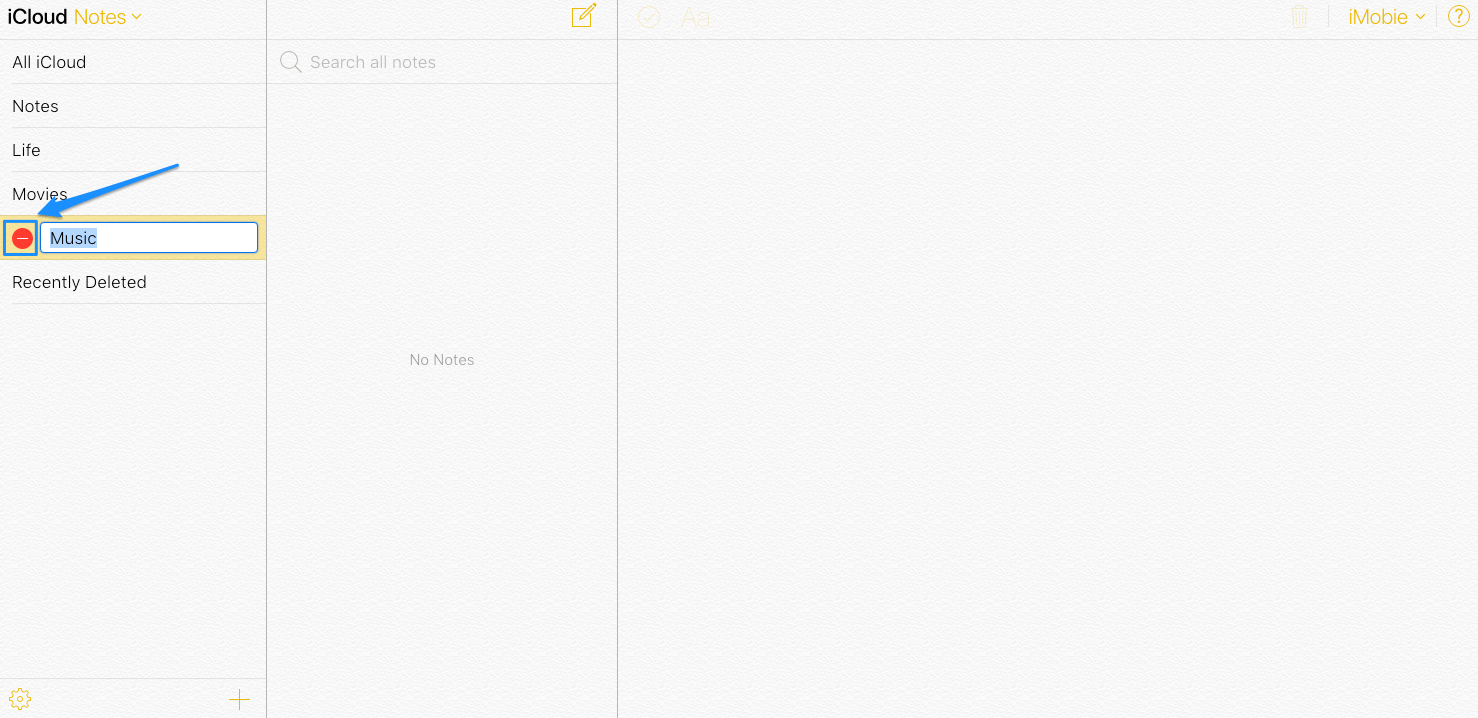
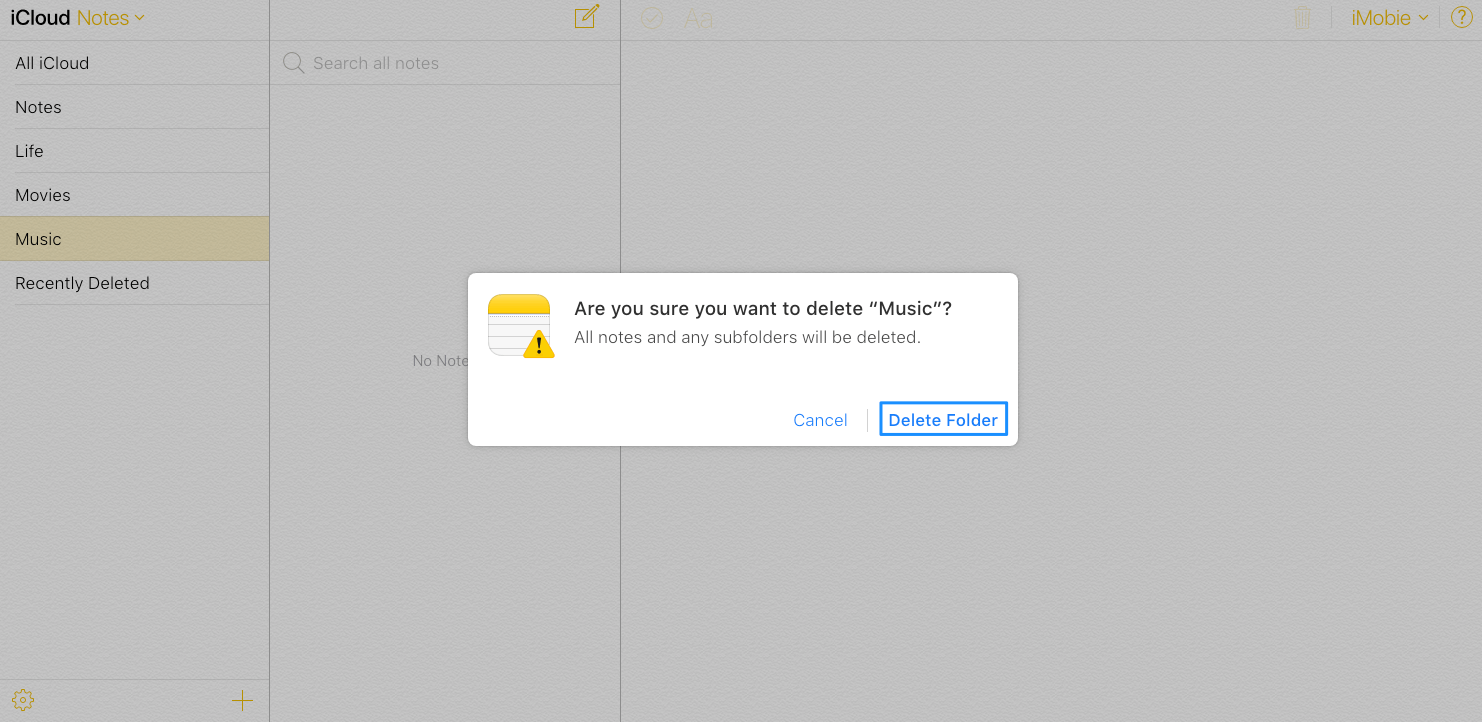
3. After that, the interface below will pop up. Please click the “Delete Folder” button to remove your unwanted note folder. Then the folder will be deleted successfully.
What to do if I delete some notes on icloud.com by mistake?
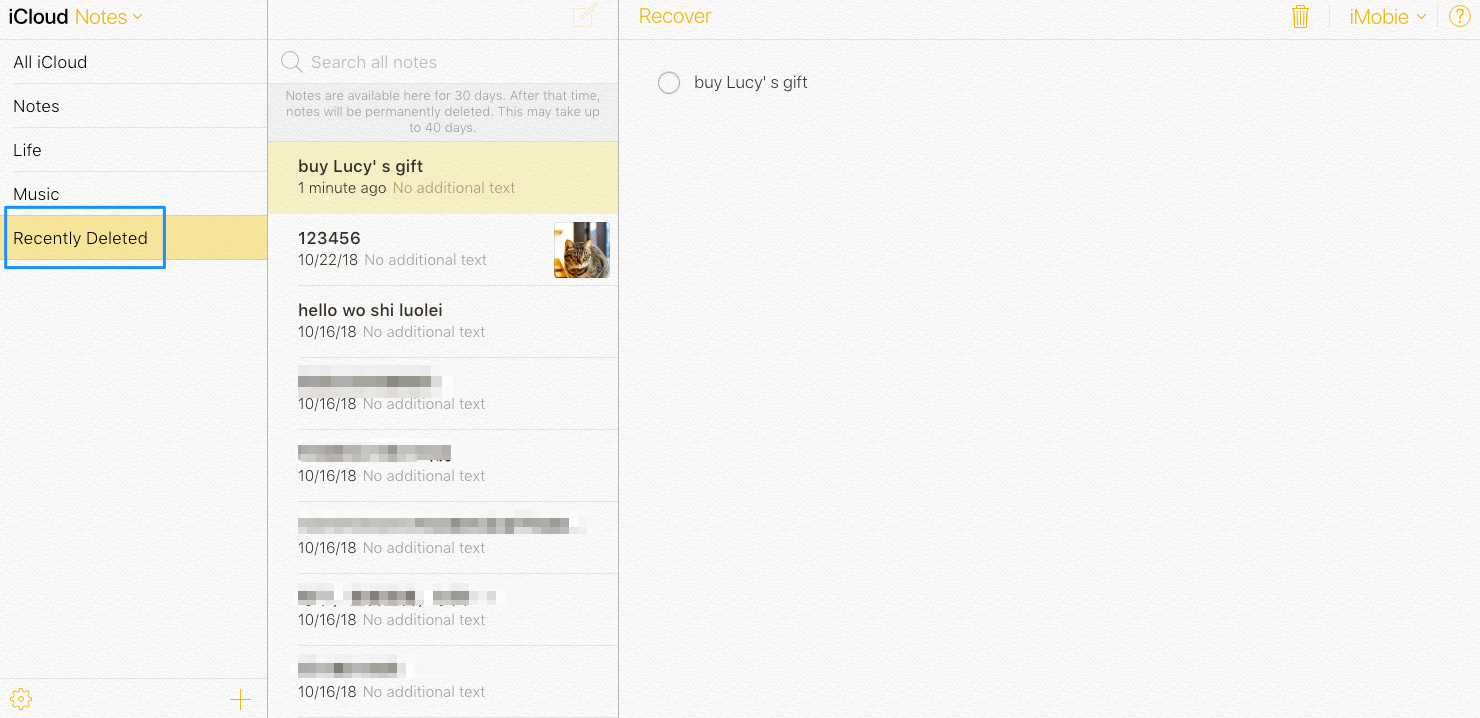
By default, the deleted notes will be saved on “Recently Deleted” for 30 days. The notes will be permanently deleted after that time. If you accidently delete some notes on icloud.com, you can find them on “Recently Deleted” folder. Please kindly refer to the detailed instruction to learn more about that.
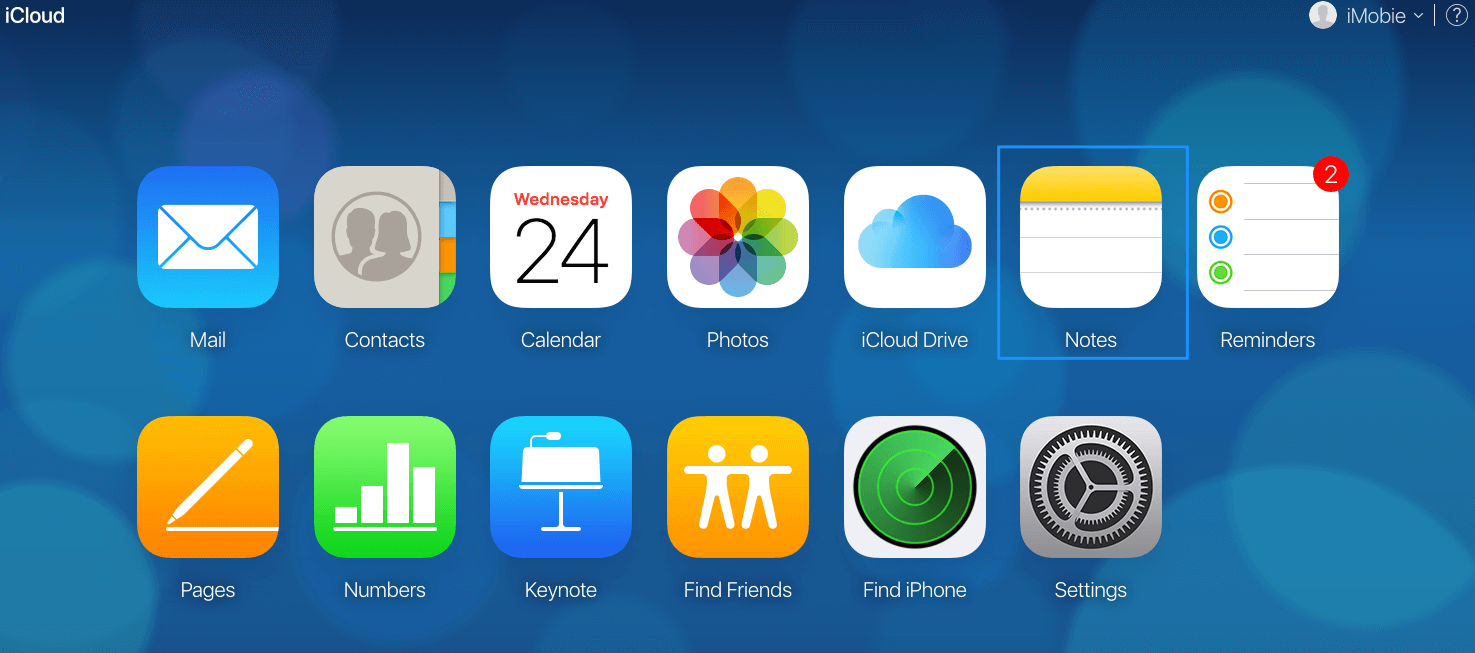
1. Go to iCloud official website (icloud.com) > Log in your iCloud account > Click Notes icon.
2. Please click the “Recently Deleted” folder on the left side of the notes interface. Then you can view the notes that are deleted by mistake. If you want to recover them, please kindly click Recover button. If you want to delete them permanently, please click the Trash icon.
-
How to add new event of calendar on icloud.com?
How to create new event of calendar on icloud.com? Please follow the detailed instruction below to know more about that.
1. Go to iCloud official website (icloud.com) > Log in your iCloud account > Click Calendar icon.
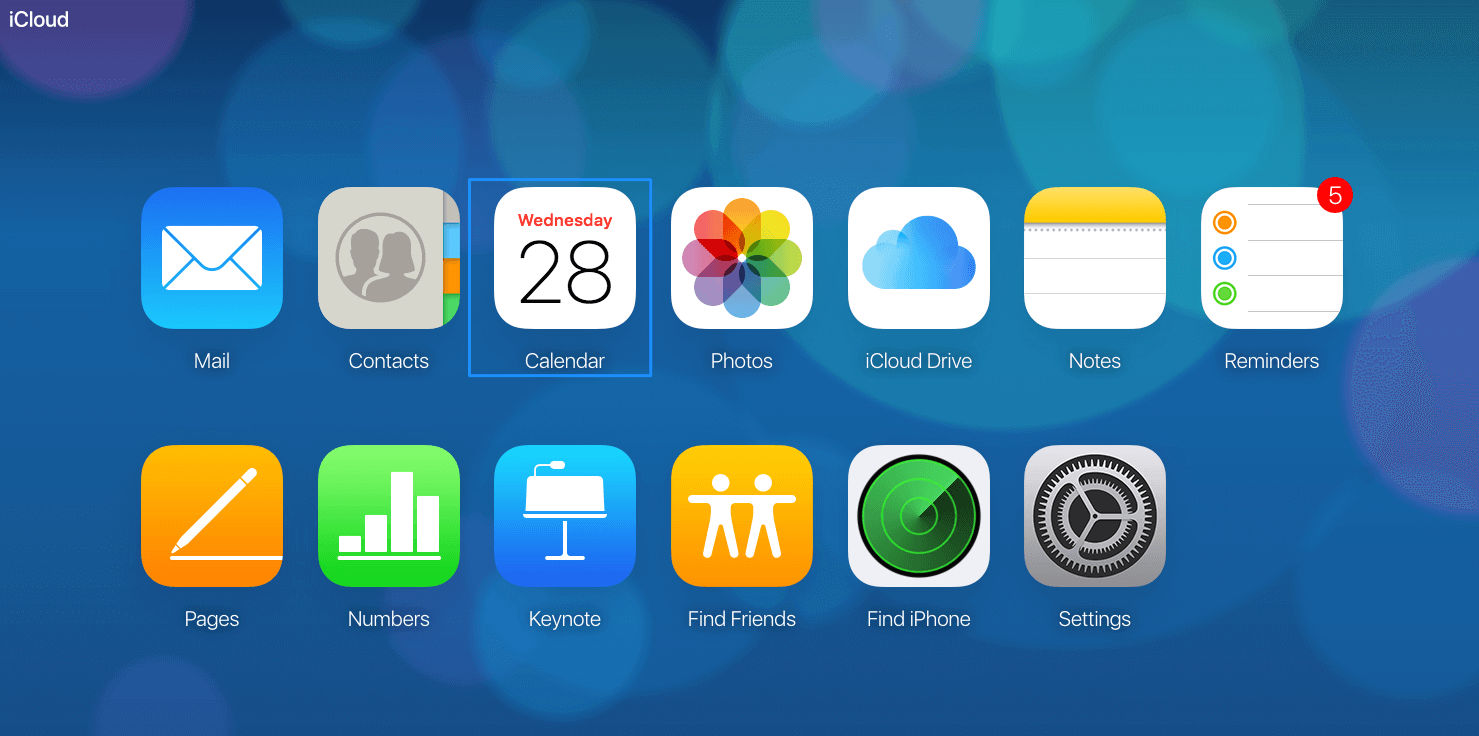
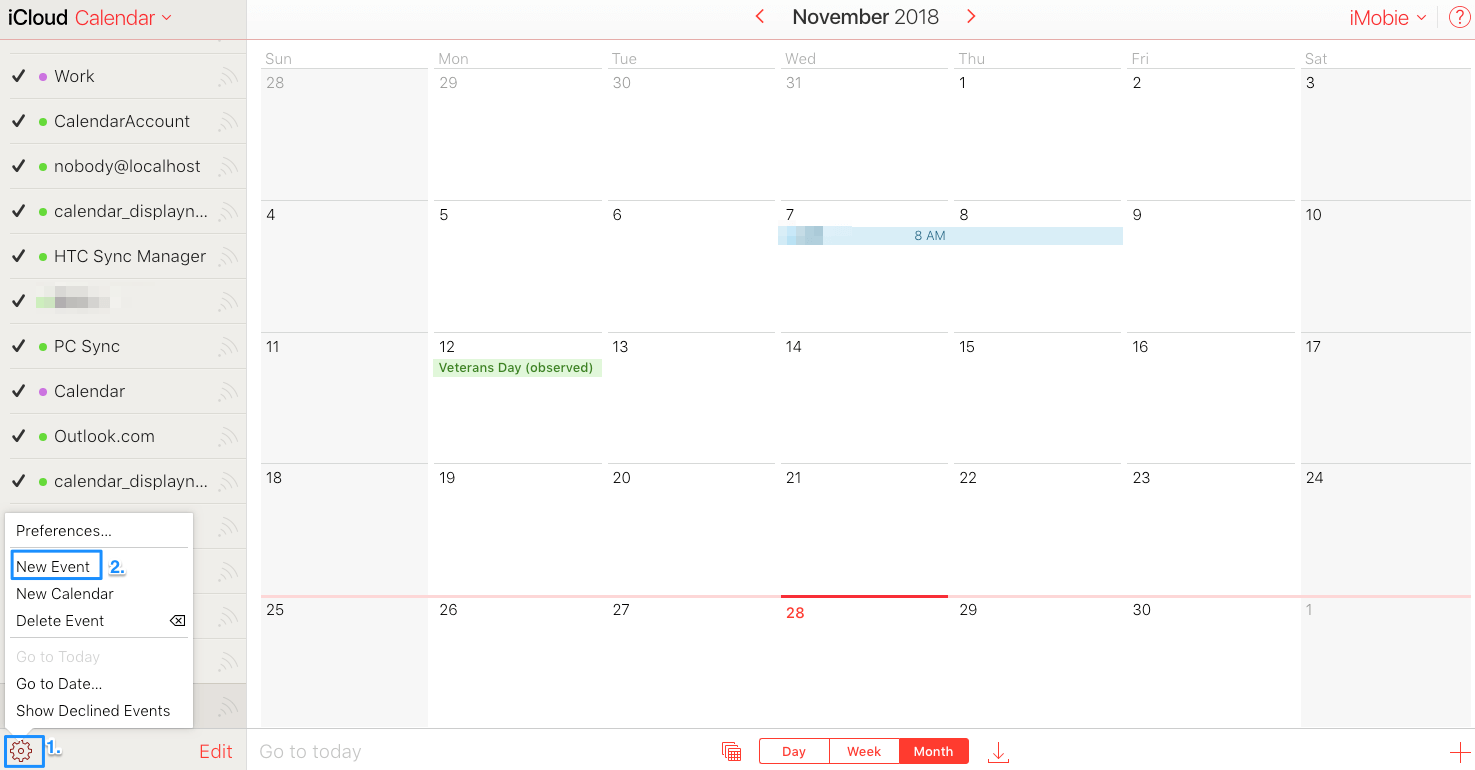
2. Please click the Setting button on the bottom-left of the calendar interface. Then the interface below will pop up. Please click the “New Event” button.
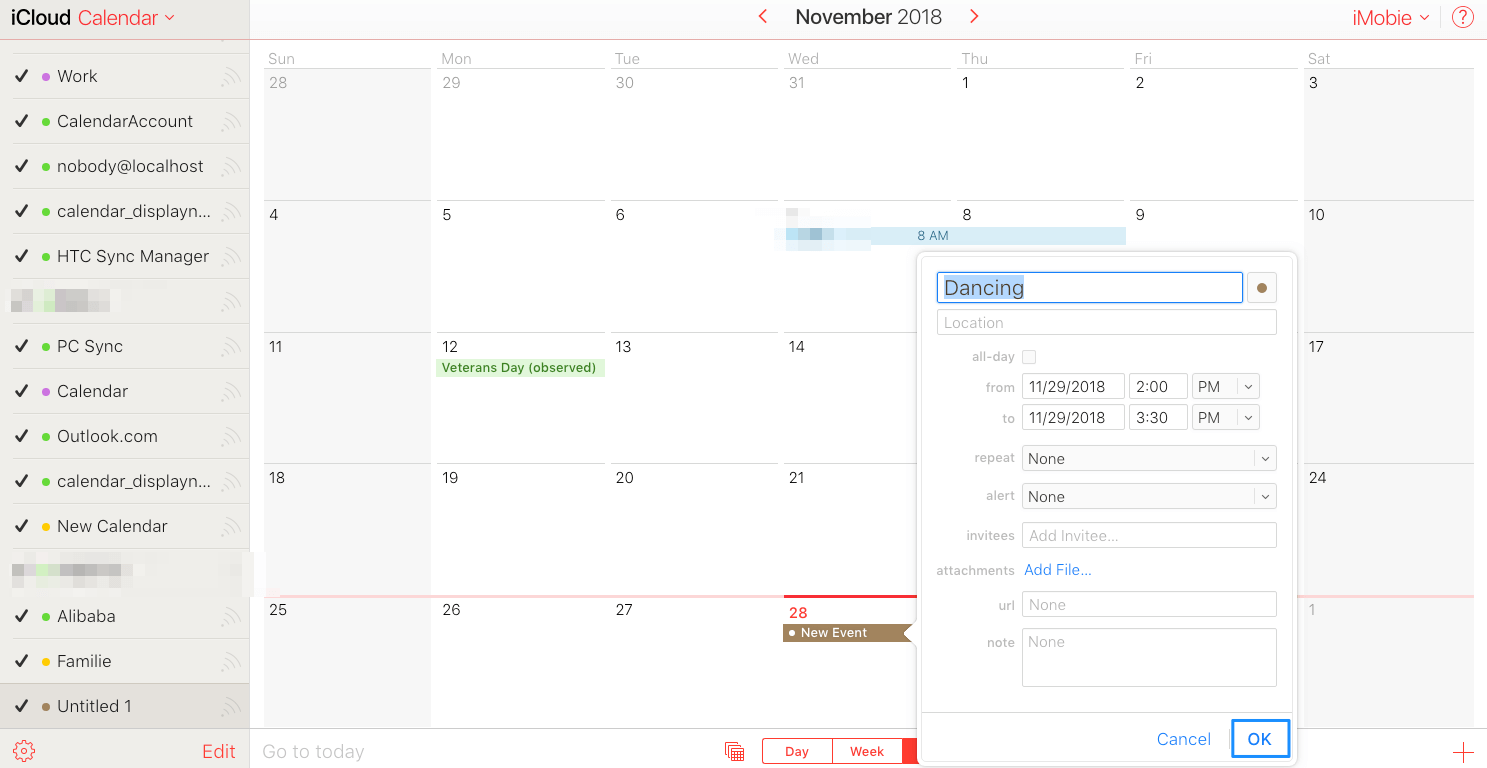
3. The following interface will be displayed. Please enter the description about the event, choose the date and so on. The new calendar event will be added successfully after clicking “OK” button.
How to edit the event of calendar on icloud.com?
How to edit the event of calendar on icloud.com? Please follow the detailed steps below to know more about that.
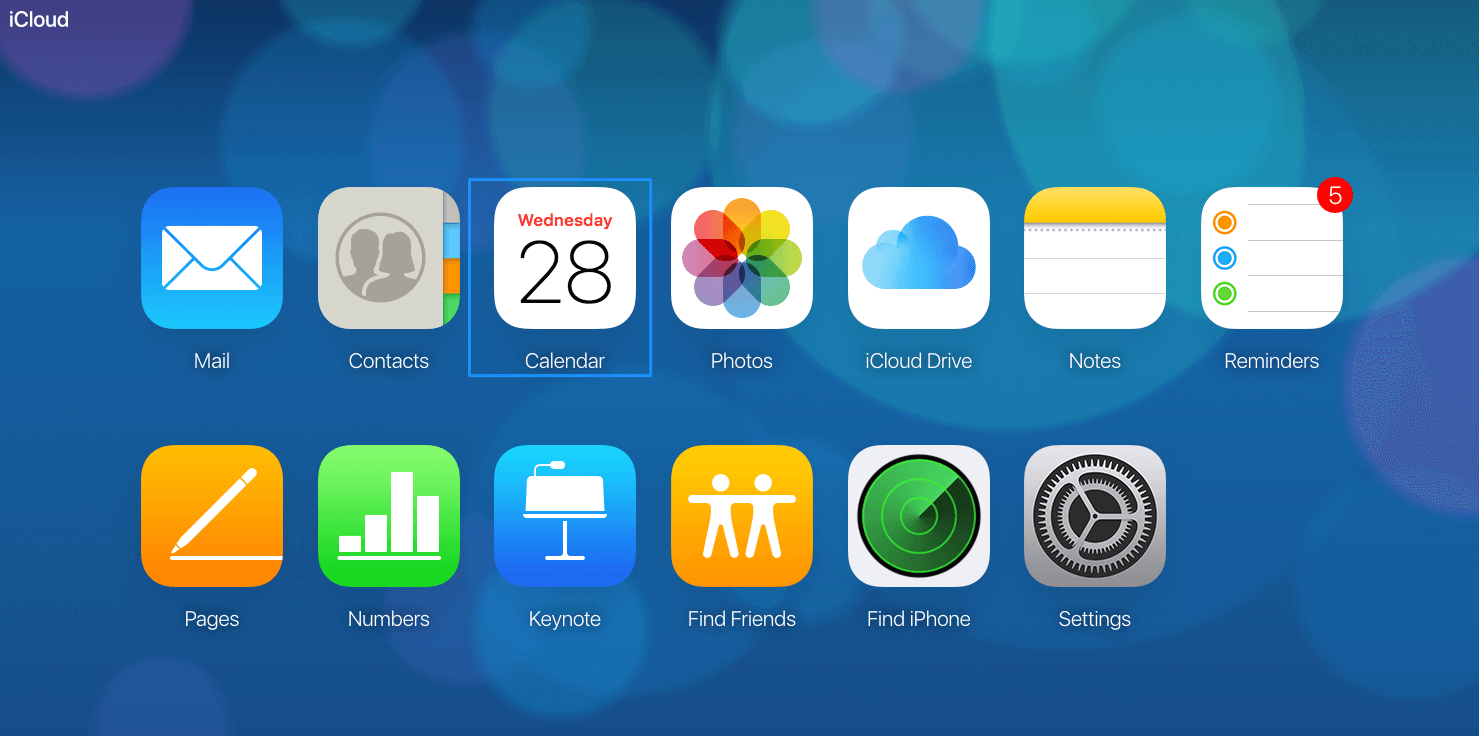
1. Go to iCloud official website (icloud.com) > Log in your iCloud account > Click Calendar icon.
2. Please select the event that you try to edit firstly and then click the Edit button at the bottom of the calendar interface.
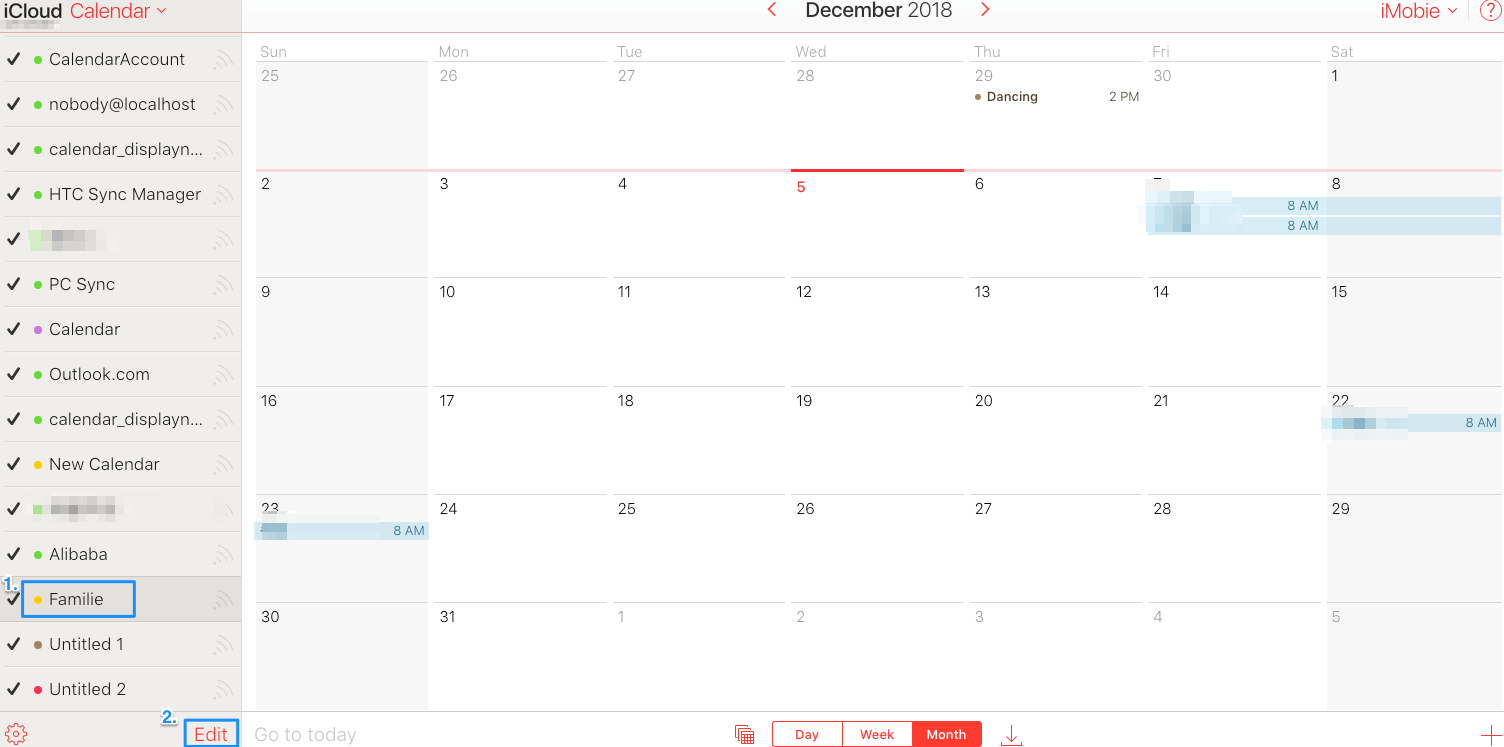
3. After that, the interface below will pop up. Please write the description that you want. The calendar event will be edited successfully after clicking the “Done” button.
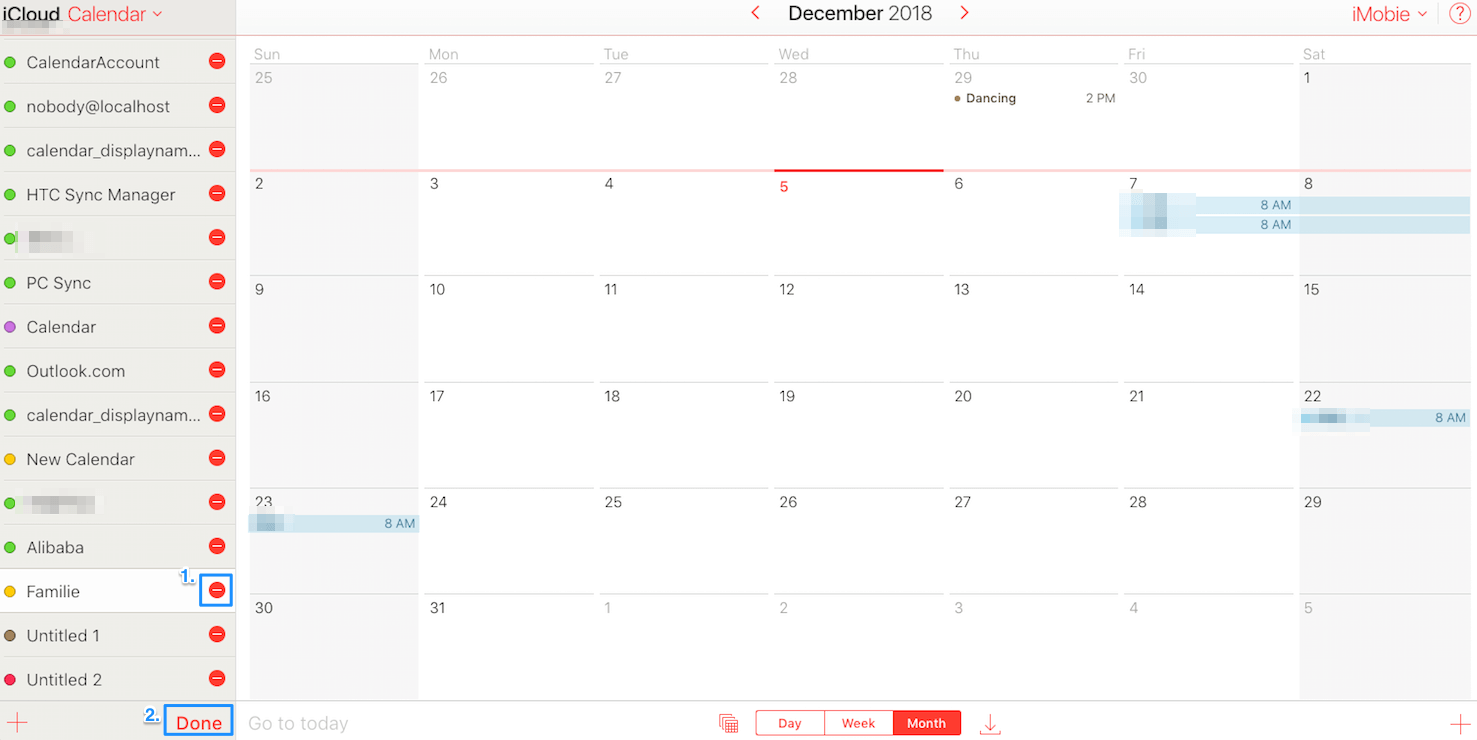
How to delete the event of calendar on icloud.com?
How to remove the event of calendar on icloud.com? Please refer to the following detailed instruction to learn more about that.
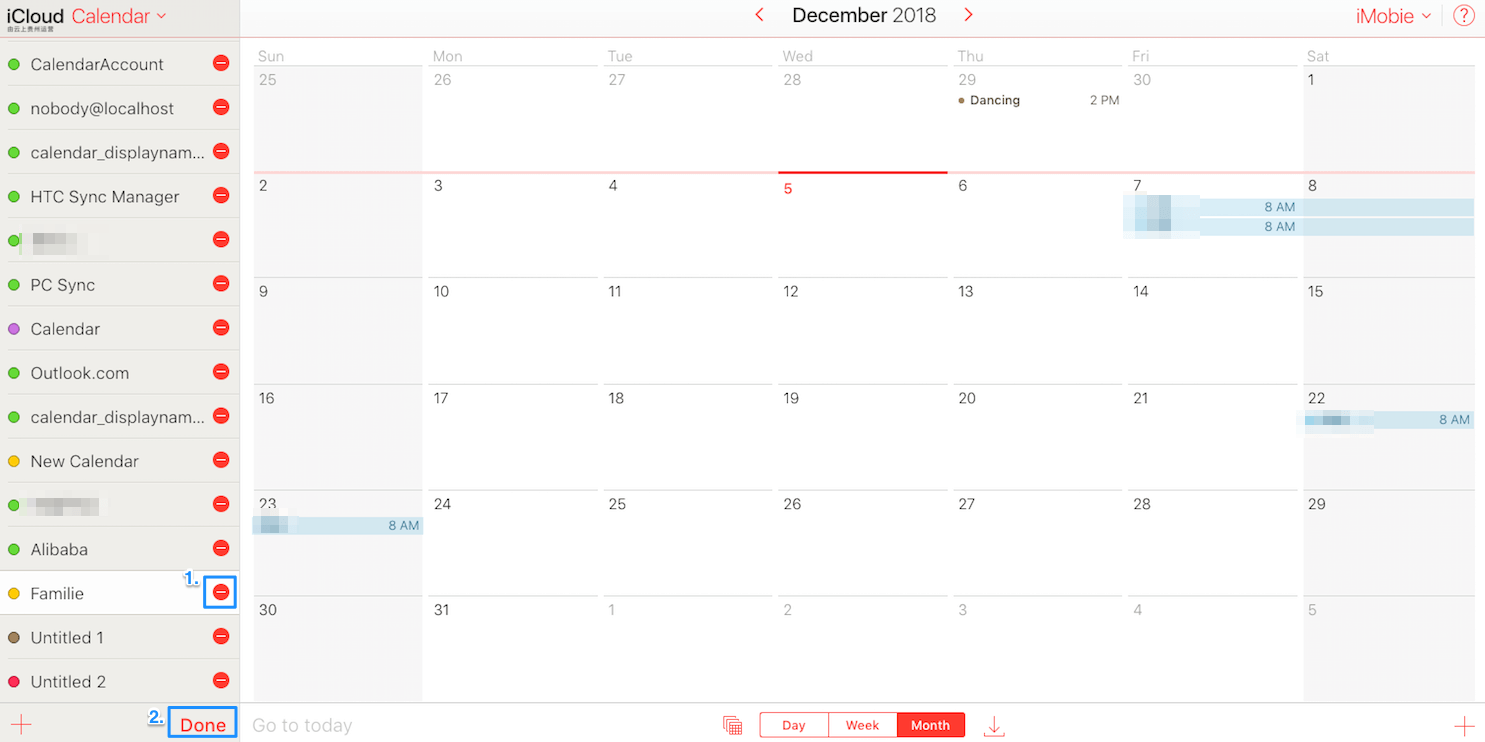
1. Go to iCloud official website (icloud.com) > Log in your iCloud account > Click Calendar icon.
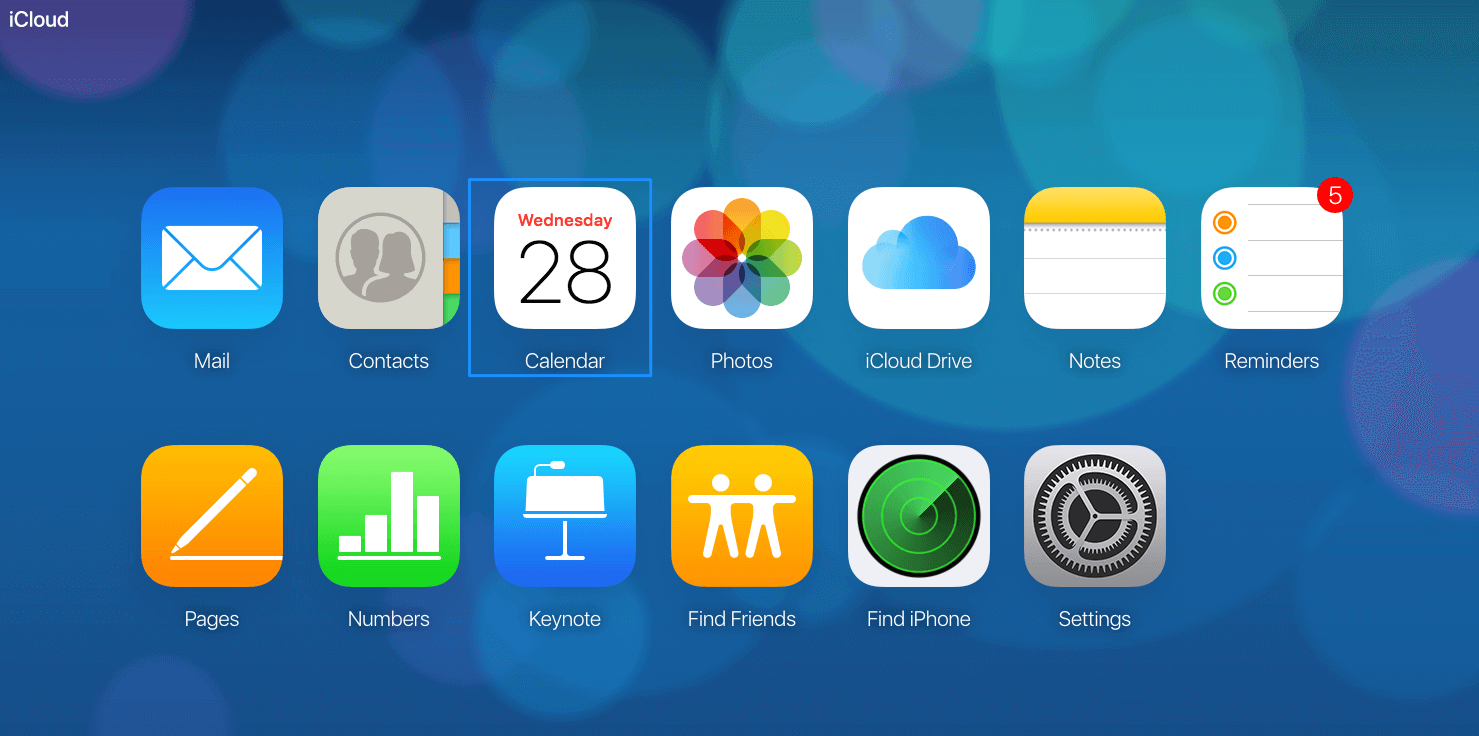
2. Please choose the event that you want to delete firstly and click the Edit button at the bottom of the calendar interface.
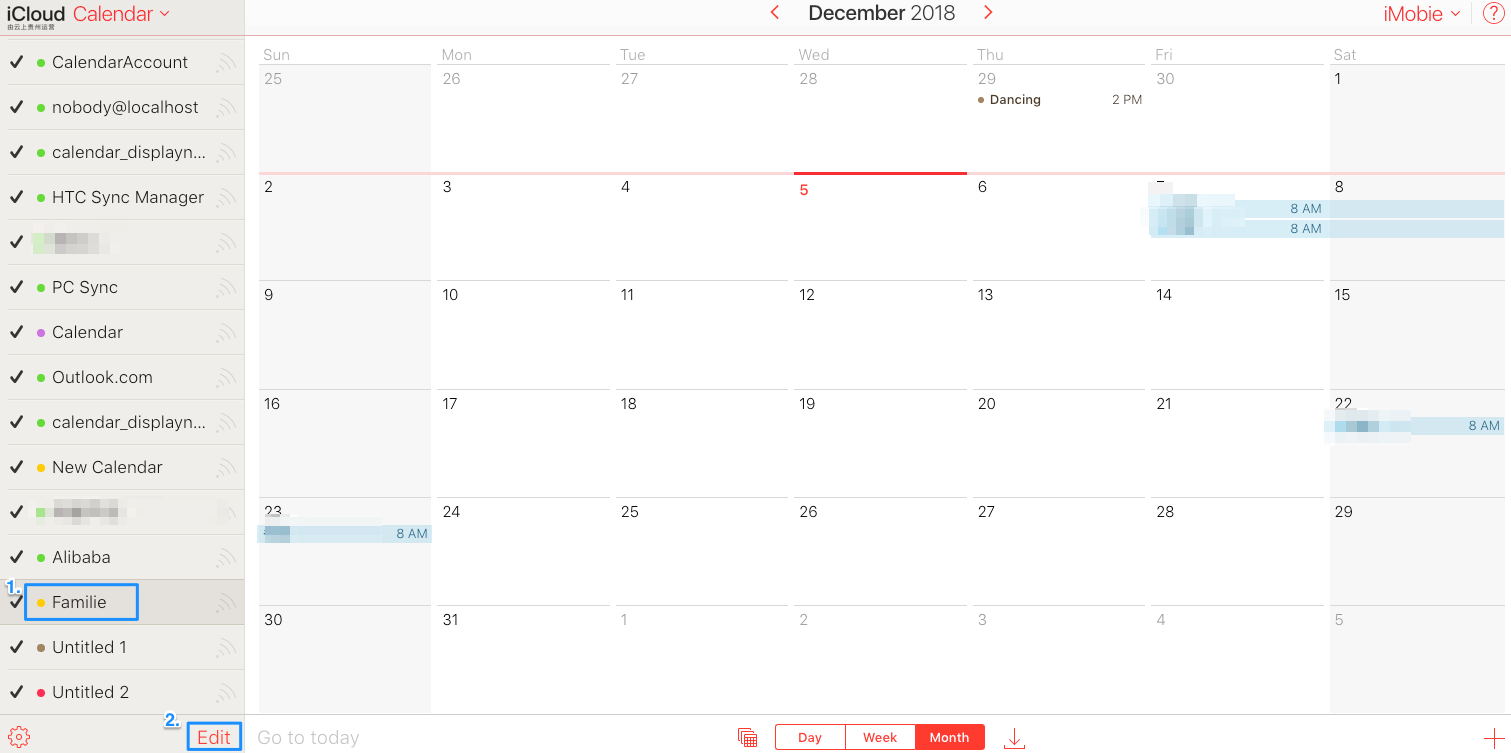
3. Then, the interface below will be showed. Please kindly click the Remove icon just like the following interface. After that, a window will pop up to ask you whether you are sure to delete the event. The unwanted calendar event will be removed successfully after clicking “Delete” button.
-
How to backup with iCloud?
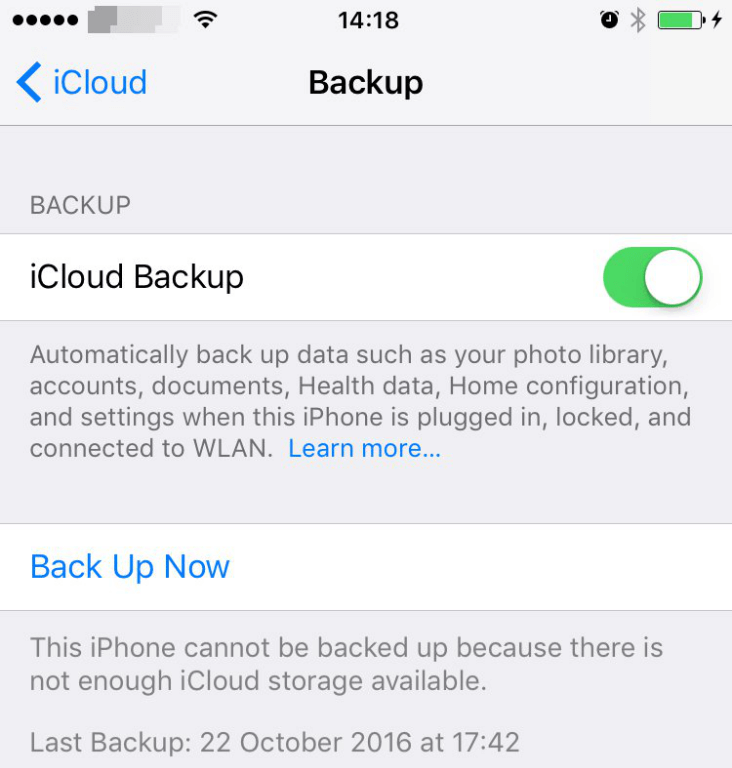
1. Connect device to Wi-Fi network > Go Settings > Your Name> Choose iCloud.
2. Tap iCloud Backup option> Click Backup up now > Make sure the Wi-Fi connection is fine until the backup process completes.
How to restore your iOS device from an iCloud backup?
How to restore your iOS device from iCloud backup? Please refer to the steps below to learn more about that.
1. Please go to Settings > General > Reset > Erase All Content and Settings.
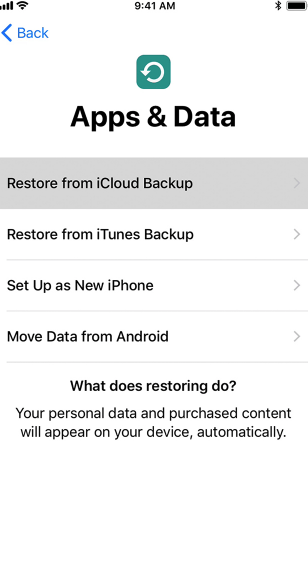
2. Please refer to the steps of onscreen setup until you get to the Apps & Data screen. Then please tap Restore from iCloud Backup.
3. Please log in iCloud with your Apple ID. After that, please choose a backup. You can view the date and size of each backup and select the most relevant. And then it starts transferring.
4. After that, please sign in your Apple ID account to restore your data when prompted. If you forget your password, you can click Skip this Step and sign in later.
5. Please make it connected and wait for a progress bar to appear and complete. The completing time is based on the size of backup and the network speed. So please wait a moment patiently. If you disconnect from Wi-Fi, the progress will pause until you reconnect.
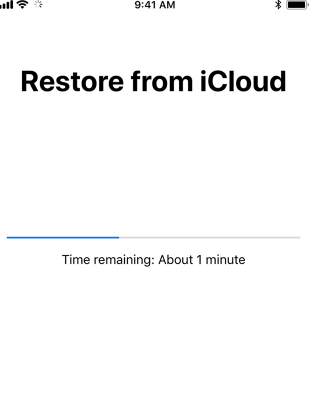
6. Then you can complete setup and enjoy your device. Your data will continue to restore in the background. Please be patient. At the same time, please connect to Wi-Fi and power to make the process finish.