How Do I Crop Image without Losing Quality
Cropping images without losing quality requires efficient techniques. This post will teach you three proven ways to crop images without losing quality on an iPhone, or computer, or by using the best online tool.
Image cropping is a fundamental editing task that can come in handy in different situations. Perhaps the image for your social media post does not fit the criteria of different social media platforms. Or you took a shot that happens to contain some unnecessary objects. Regardless of what your situation might be, there are several techniques you can use to crop your image quickly and easily. But how do you do this without losing quality?
Well, this guide has shared different methods you can use to crop images without losing quality. So, don’t hesitate to keep reading!
How to Crop Single Image on iPhone without Losing Quality
The best way to crop images on your iPhone without losing quality is by using the built-in Photos app. The Photos app supports tools that you can use for basic editing tasks. You can use it to add filters, adjust, rotate, crop, and do lots more on your images within a few taps. You don’t even need any third-party app.
Here is how to crop images on iPhone with the Photos app;
- Step 1: Open the “Photos” app on your iPhone and select the “Image” you intend to crop.
- Step 2: Tap on “Edit” at the top-right side.

Tap on “Edit” at the top-right side.
- Step 3: Select “Crop” from the bottom of the screen and use the “Slider” that appears around the image to crop out the segment you don’t want.

crop out the segment you don’t want
- Step 4: Once you’re done, tap “Done” at the top-right corner to save the cropped image.
How to Crop Multiple Images without Losing Quality at Once [Professional]
If you have lots of images that need to be cropped, using the built-in app on your iPhone or computer is not an efficient way to get the job done. We recommend using a professional online photo editing app like Fotor – Crop Images Online for Free!
Yes, Fotor is an online photo editor that offers a powerful image cropper for cropping images online for free without losing quality. This tool’s image cropper saves you time by providing you with advanced features to crop more than two images with just a single click. All you just need is to drag and drop your photos to the tool’s interface, select the aspect ratio or dimension, and Fotor will crop your images within a few seconds.

Crop Multiple Images without Losing Quality at Once
Additionally, Fotor’s Image Cropper can be used to crop images into different kind of shapes. And the best part? It offers more image editing features that allow you to add effects to your images, fine-tune them, rotate, flip, add color, add text, and do lots more.
Key Features
- Crop up to 50 images simultaneously with fast speed.
- Easily share cropped images to third-party platforms like WhatsApp without losing quality.
- Edit cropped images with advanced features for adding filters, effects, etc.
- Support smart AI tools for removing blur, enhancing images, etc.
How to Use Fotor to Crop Image Without Losing Quality
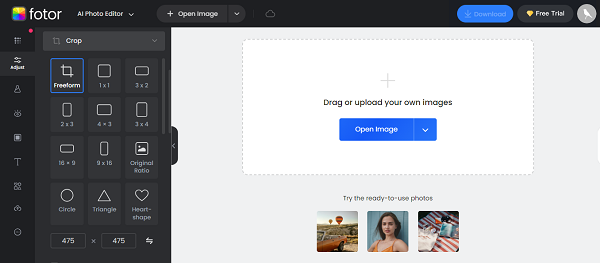
Step 1: Open “Fotor Image Cropper” on your device’s browser. Click on “Open Image” to upload the “Images” that needs to be cropped. Or you can just drag-and-drop them to the tool’s interface.

Click on “Open Image”
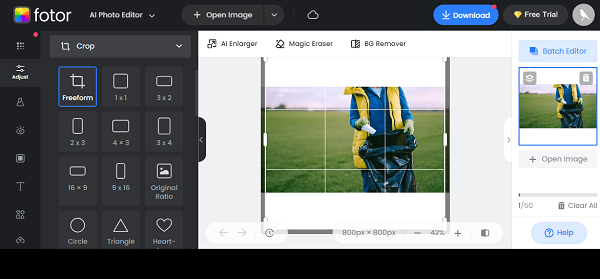
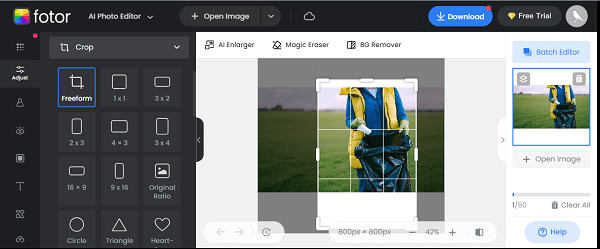
Step 2: Once you upload the “Image”, select the form that you’d like to use to crop the image (in this case, we used the free form). Then, use your computer’s “Cursor” to drag the slider that appears on the image and crop it according to your requirements.

Crop image according to your requirements
Note: If you want to crop more than one image file, click on “Open Image” on the right side of the page to add more image files.
Step 3: After you finish cropping the images, click on “Download” at the top-right corner to save them to your device’s local storage.

Click on “Download” at the top-right corner to save photo
How to Crop Images on A Computer
You can also use your computer’s built-in tool to crop your image. However, keep in mind that this method is only effective when you don’t have a lot of image files to crop.
In this part, we shared the steps of cropping images on Mac and Windows computers within a few clicks.
Steps on Windows
- Click on the “Start Menu” and search for the “Photos” app.
- Locate the “Image” you want to “Crop” in the “Photos” library and double-click it.
- Click on the “Edit Image” button at the top of your screen, as shown in the screenshot below.

Crop Images on A Computer on Windows
- Once you select the edit option, the slider to crop your image will appear on your image by default. But if it does not, click on the “Crop” icon from the top of your screen.
Click on the “Crop” icon
- Posting the part of the “Image” you need to be within the rectangle, just like it is displayed in the screenshot. Then, left-click your computer cursor to confirm the action.

Left-click your computer cursor to confirm the action
- Click on “Save as copy” at the top-right corner to save the new image file.
Steps on Mac
- Locate the “Image” you want to crop in “Finder” app and click on it.
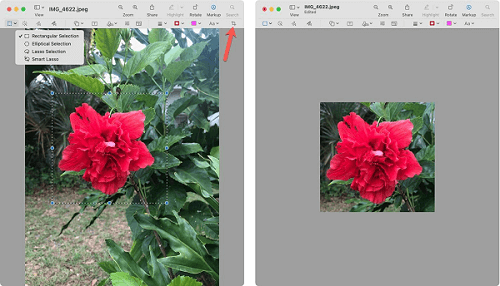
- The image should open in “Preview”. Click on the “Markup” button at the top of the preview page.

Crop Images on A Computer on Mac
- Navigate to the top-left corner and click on the “Select Tool” button. Then, select a preferred shape for the operation.
- Now, use the selection tool to select the area of the image that you want to keep. Then, adjust other necessary settings if required.
- Finally, press “Command + K” on your keyboard to crop the image.
Conclusion
That’s all in today’s guide. As you can see from the above, the steps to crop images on iPhone, computer, or online are very straightforward. You just need to follow the technique that suits your needs accordingly. However, we recommend using the Fotor Image Cropper to be able to get the job done more efficiently without losing quality.
Product-related questions? Contact Our Support Team to Get Quick Solution >

